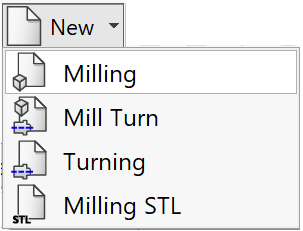
Starting a New Milling CAM-Part
When the SOLIDWORKS model is loaded, do the following:
|

|
or
Click
 Milling on the SolidCAM toolbar.
A new CAM-part is created, if you use the Automatic selection of project location and Automatic CAM-Part definition options set by default.
Otherwise, the New Milling Part dialog box is displayed.
|
When you start to program a CAM-Part, you have to decide on:
|
Loading an existing CAM-Part
When loading a CAM-Part created in an earlier version of SolidCAM, the following message is displayed:
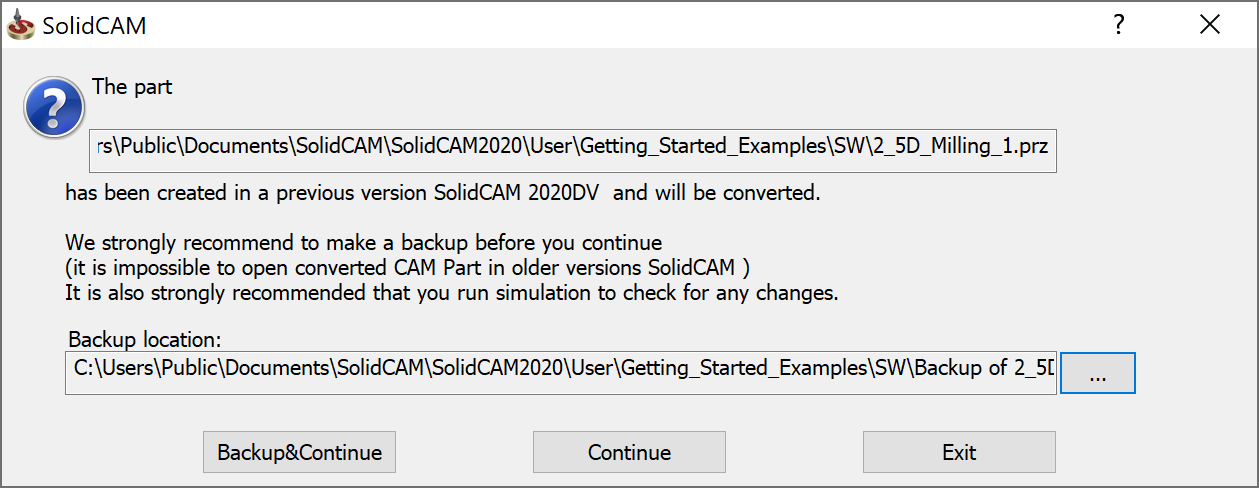
It is strongly recommended to take a backup before you continue as it is impossible to open a converted CAM Part in older versions of SolidCAM.
It is also strongly recommended that you run the to check for any changes.
Related Topics