Machine Tool Setup Library (*.tlm)
The third level of tool management offered by SolidCAM ToolKit is the Machine Tool Setup Library, which enables you to manage Tool Items in the Machine environment. You can define Tool Items and their mounting positions, such as in the Magazine and Tool Stations of the Turret(s), specific to the VMID of your CNC-Machine.

(Advanced view shown for illustrative purposes)
For documentation purposes, a new Machine Tool Setup Library is defined by importing the Tool Items from the previously created Tool Assemblies Library.
The steps to define a new Machine Tool Setup Library are as follows:
Defining New Machine Tool Setup Library
- Start a new Machine Tool Setup Library using ToolKit standalone or one of the various options within SOLIDWORKS/SolidCAM.
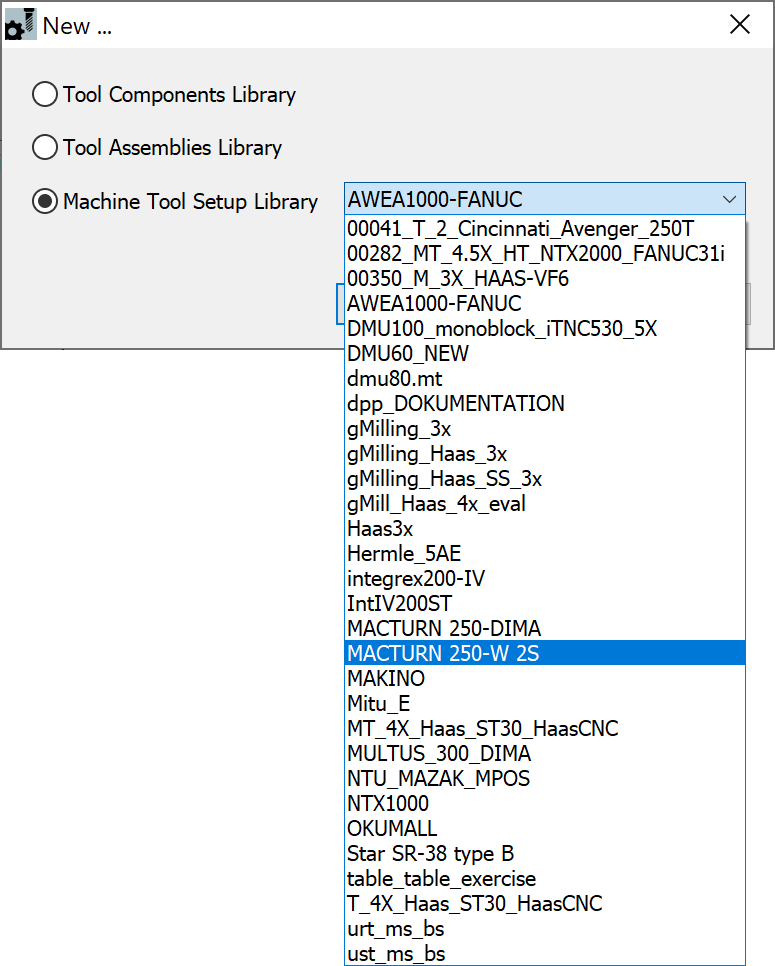
When creating a ToolKit Tool Library of this type, you have to click the corresponding field to display the list of installed post-processors and choose the CNC-Machine you want to use for the basis of your Machine Tool Setup Library.
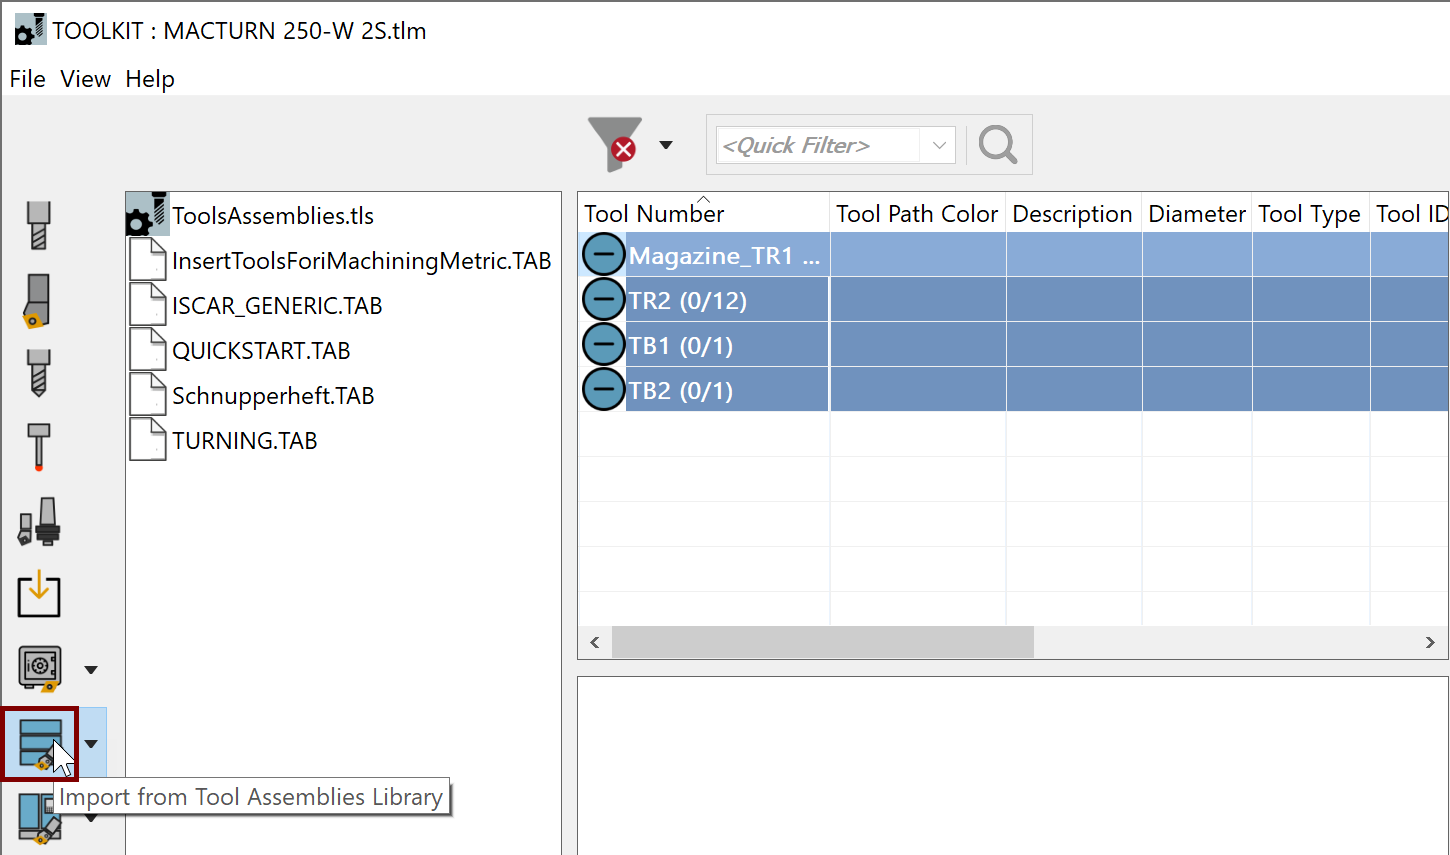
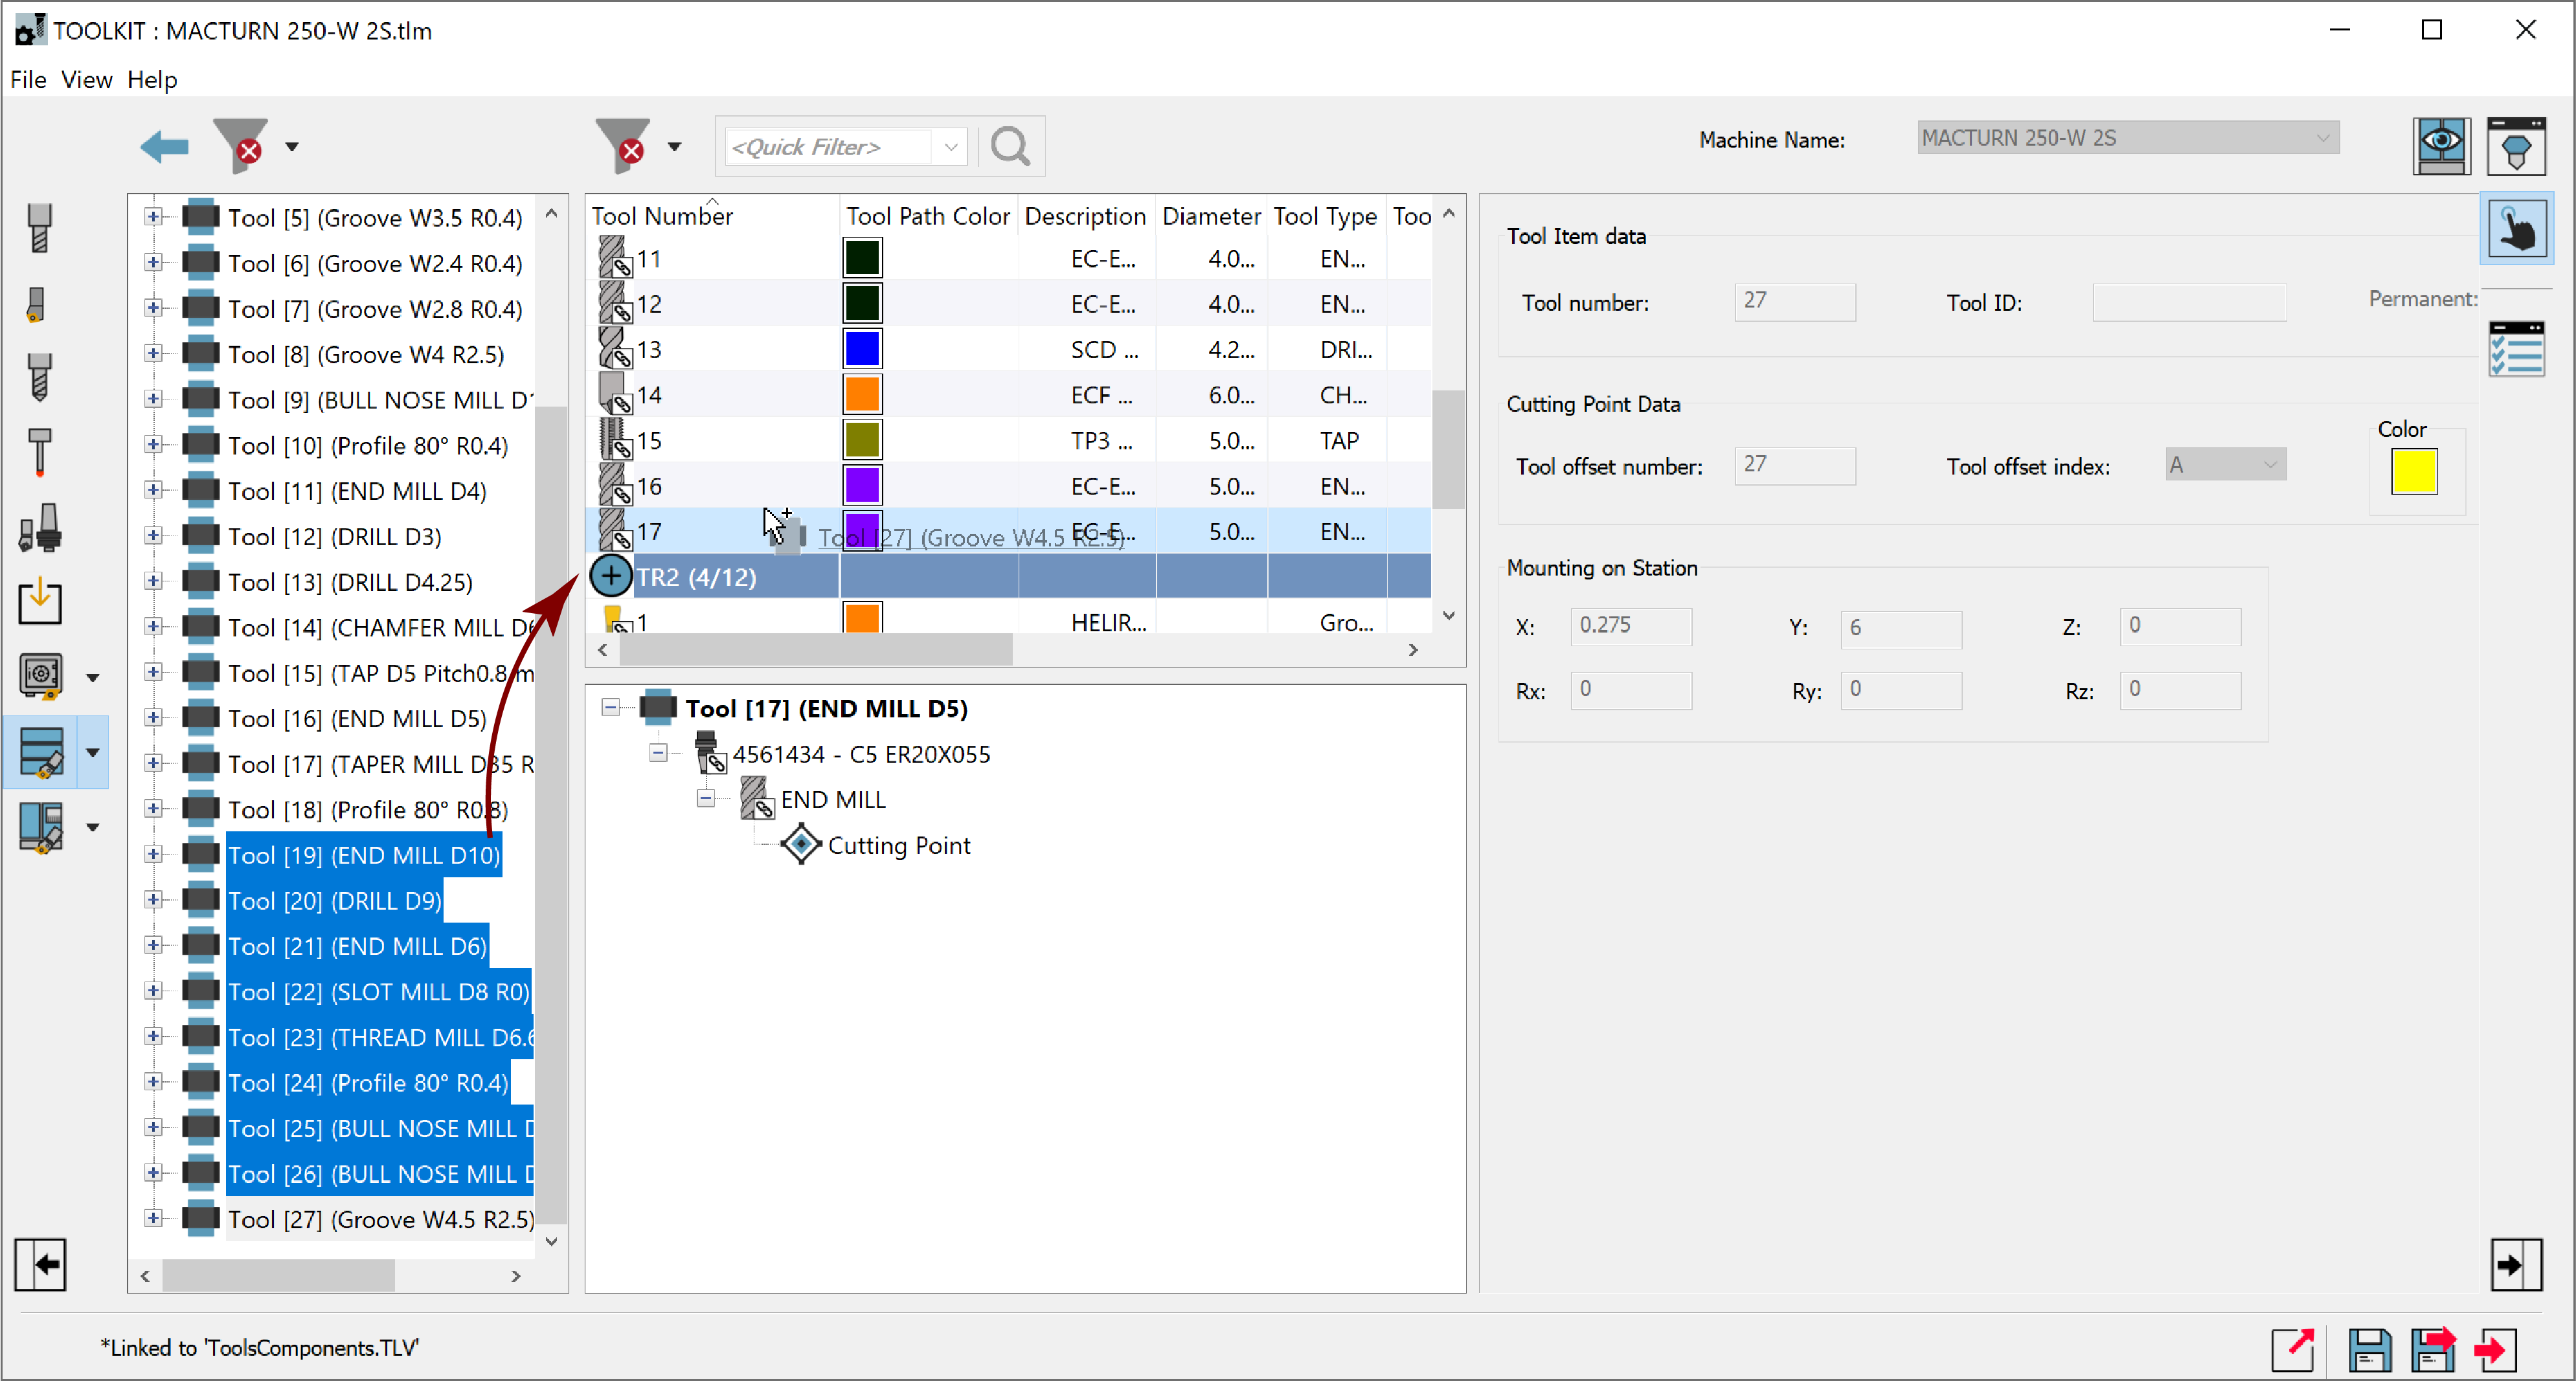
Displayed is the TOOLKIT dialog box at the Machine Tool Setup Library level.

Importing Tool Assemblies Library
On the Library Toolbar, click the Import from Tool Assemblies Library option as shown to display the available Tool Assemblies Libraries (*.tls files) in the Selection Pane.
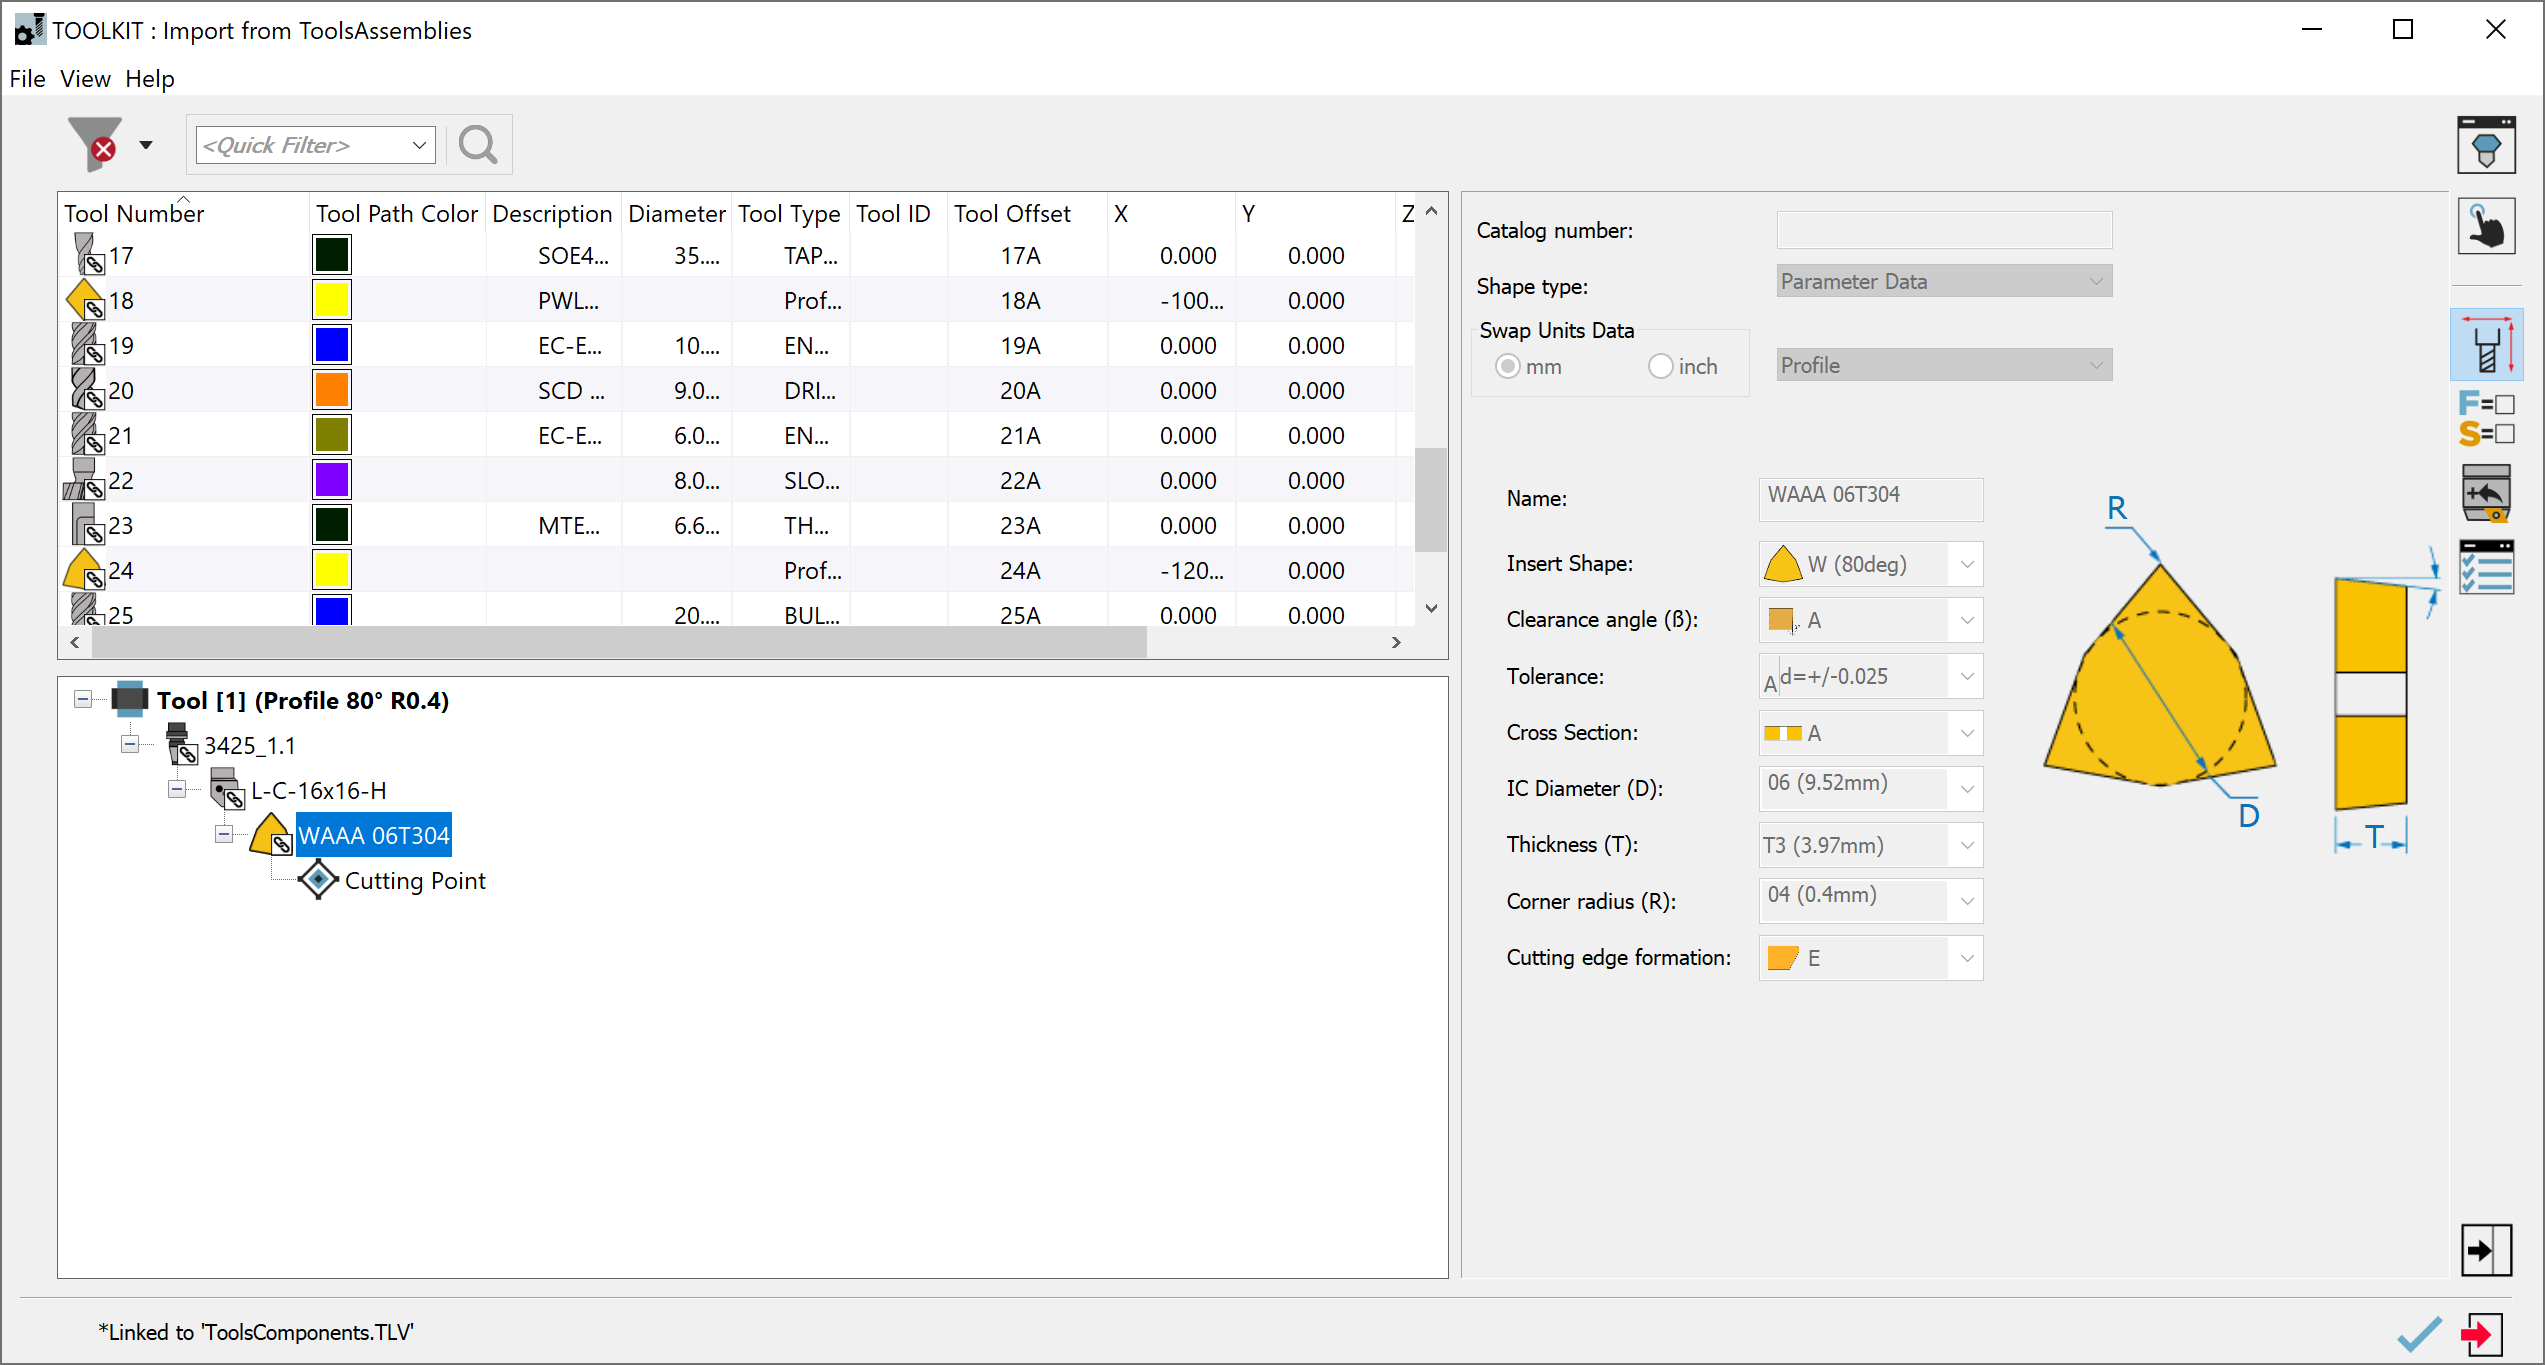
Double-click the Tool Assemblies Library from which you want to import the Tool Items.

Import your Tool Items from the appearing external TOOLKIT dialog box. The External TOOLKIT dialog box appears if you have selected the check box for External window for Import in the TOOLKIT Settings. If External window for Import is unchecked the Tool Items of the chosen CAM Tool Table appear in the Selection Pane from which the Tool Items can be imported to the Part Tool Table in the order of your choosing.
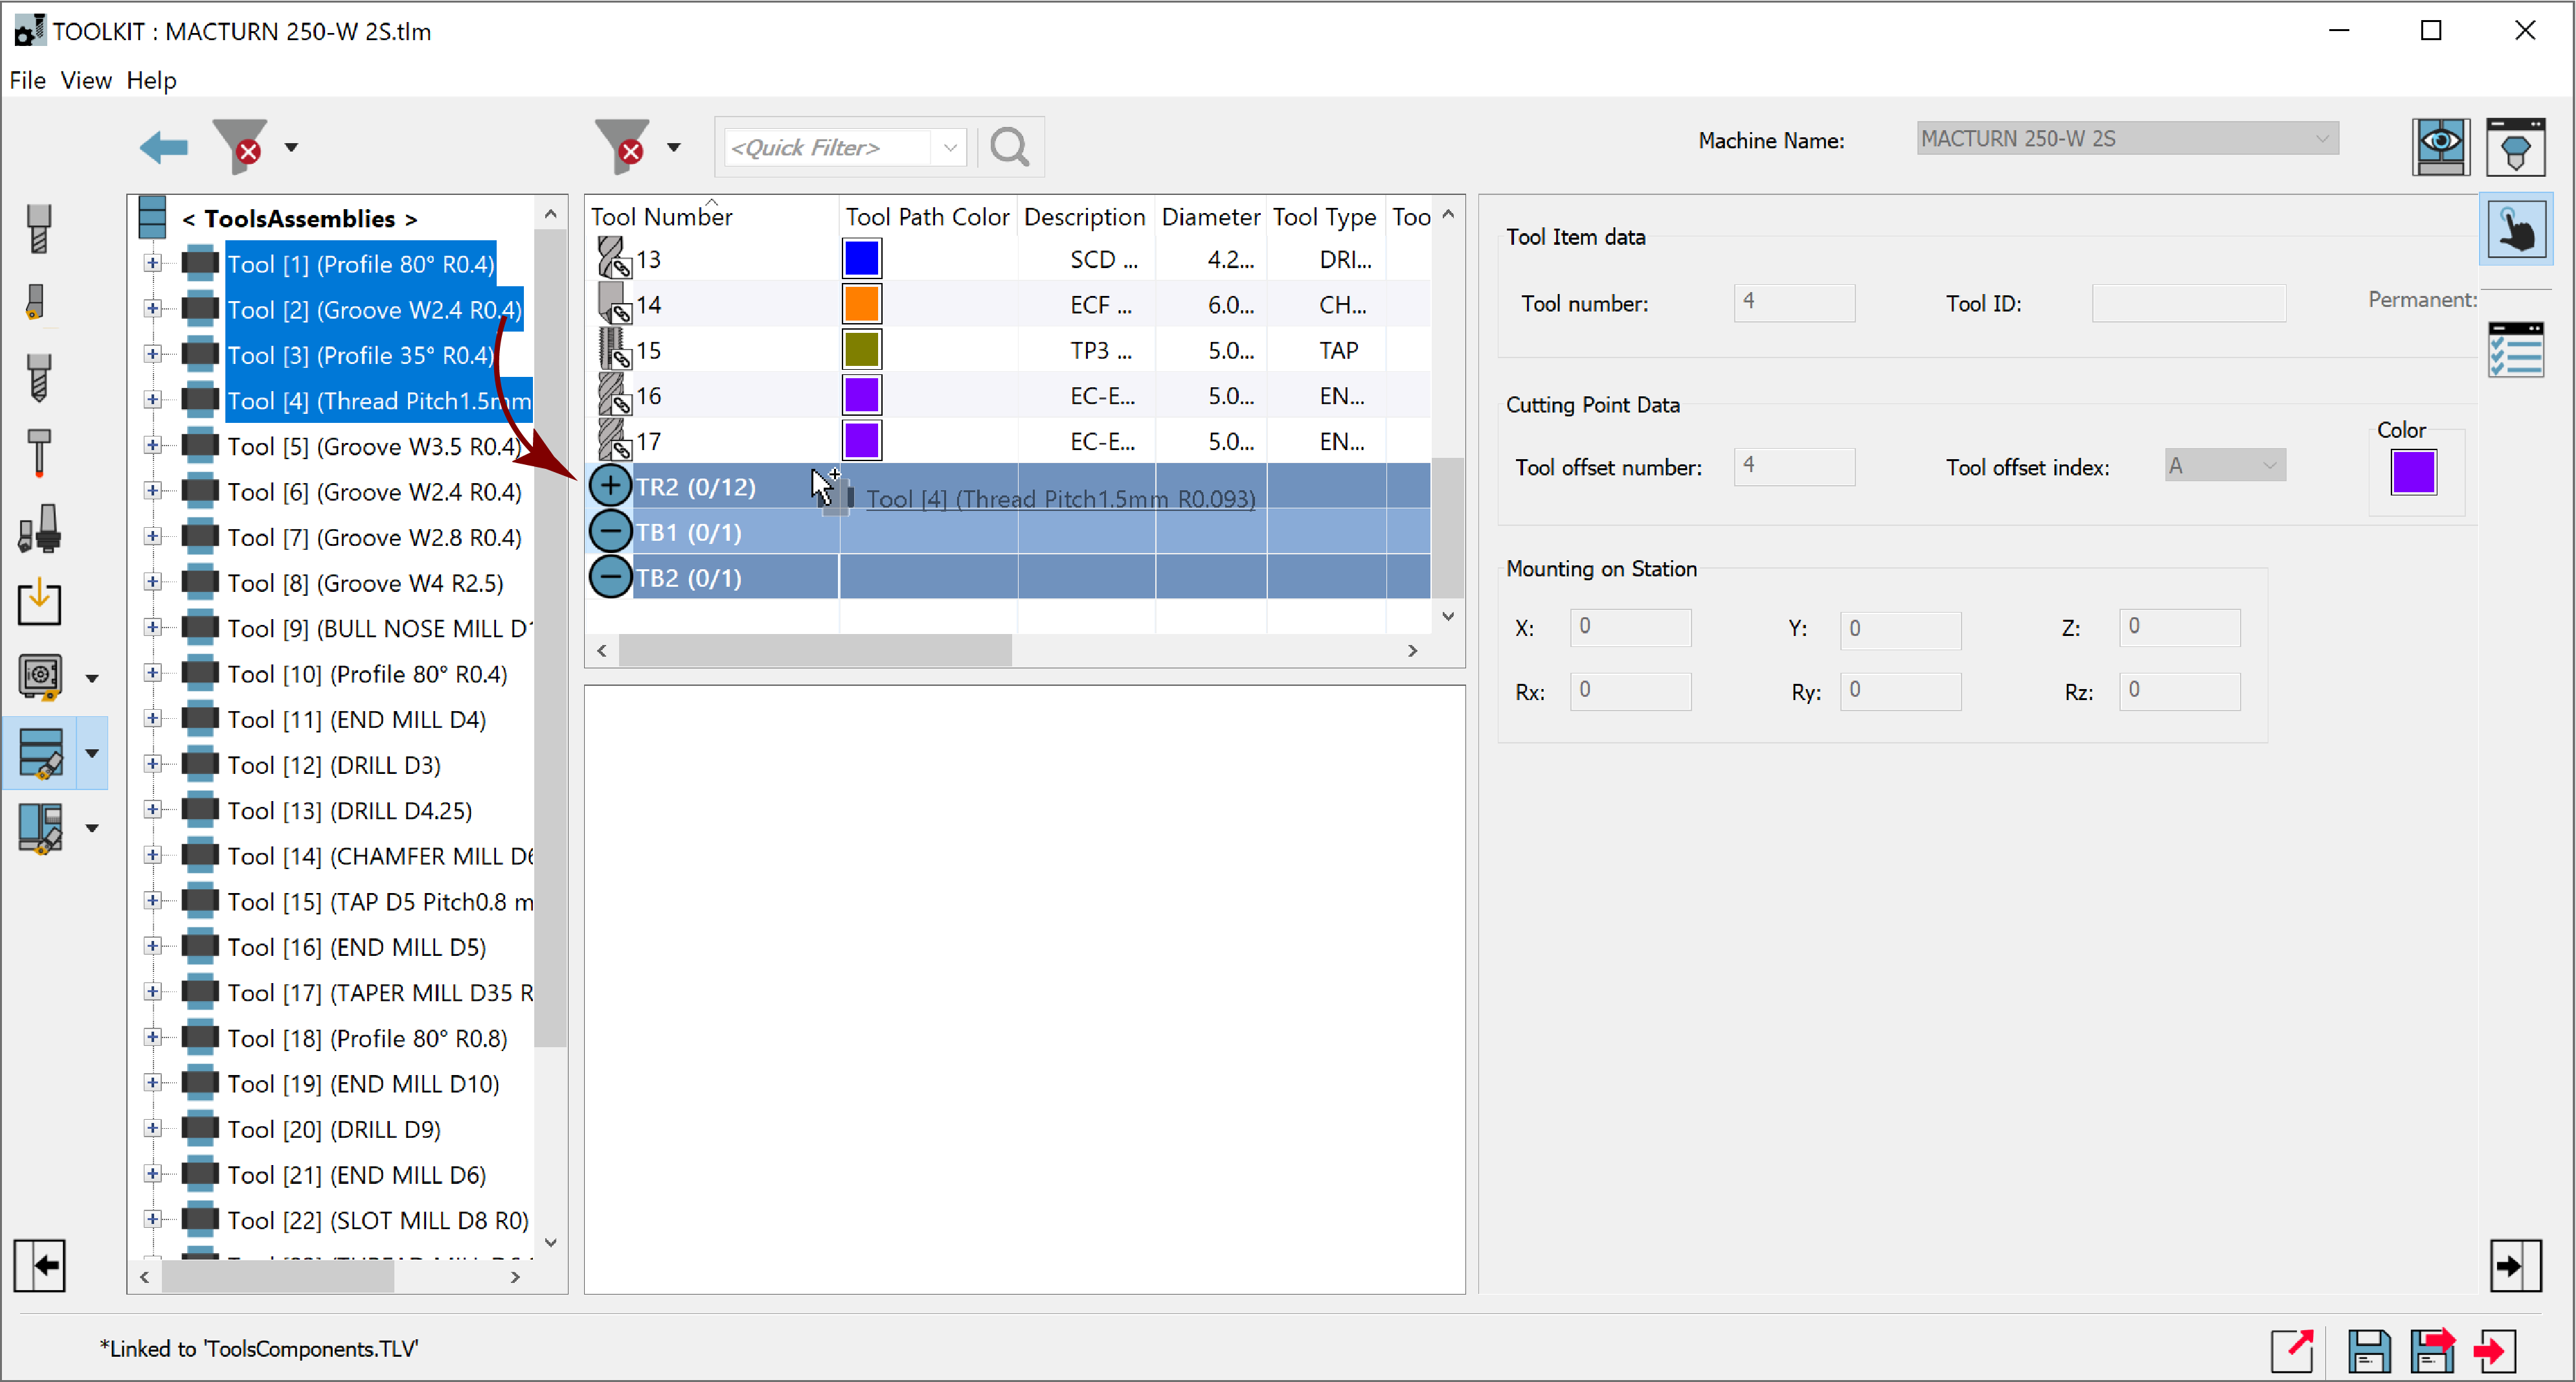
(Using this method, the Tool Items you select are imported to the Machine Tool Table in sequence with matching Tool Numbers/Positions in Magazine.)
OR exit the dialog box and import your Tool Items from the Selection Pane.
Continue importing your Tool Items into the Machine Tool Setup Library as necessary.
There is also the option to import your Tool Items using the Advanced View.
Advanced View
Simple View (default) shows Tool Items individually in Tool Item Manager.
Advanced View is for experienced users and can be enabled using the following options:
- In the ToolKit main menu
or by clicking the F2 shortcut key on your keyboard.
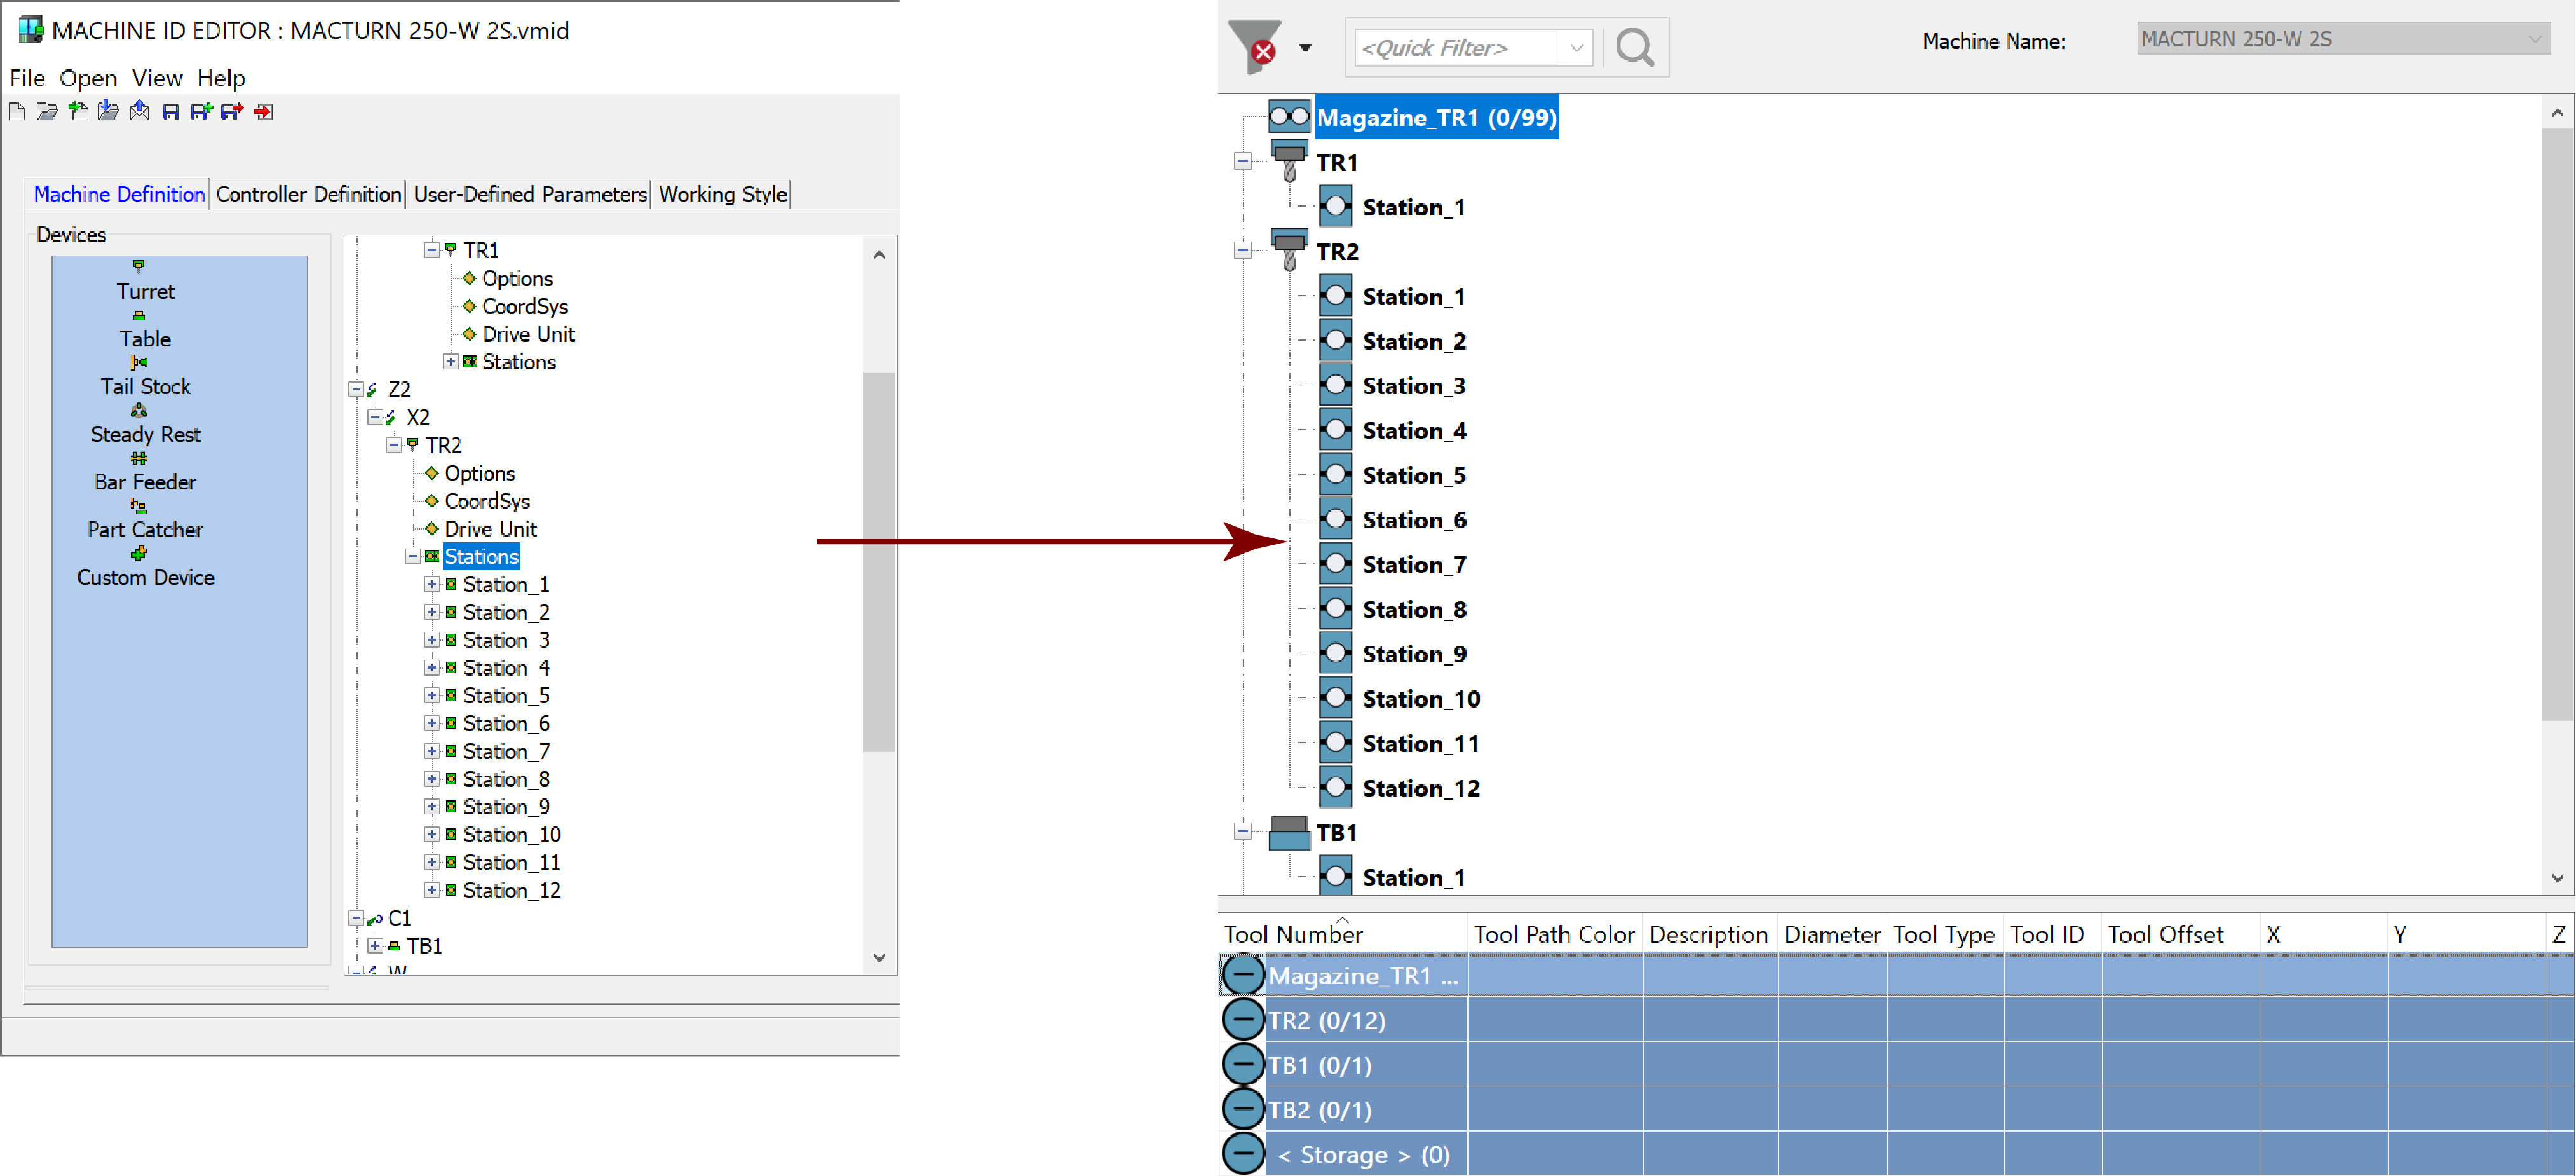
or by enabling the Advanced view in the Machine ID Editor.
When enabled, the Tool Table and Tool Item windows are swapped in the ToolKit interface.

Displayed in the Tool Item Manager are the tool holding devices of the CNC-Machine. Using the Advanced View, you can import by dragging & dropping your Tool Items directly to the Magazine or to the Tool Stations of the Turret(s). Once mounted, you can also use drag & drop to move Tool Items from one Position/Station to another.
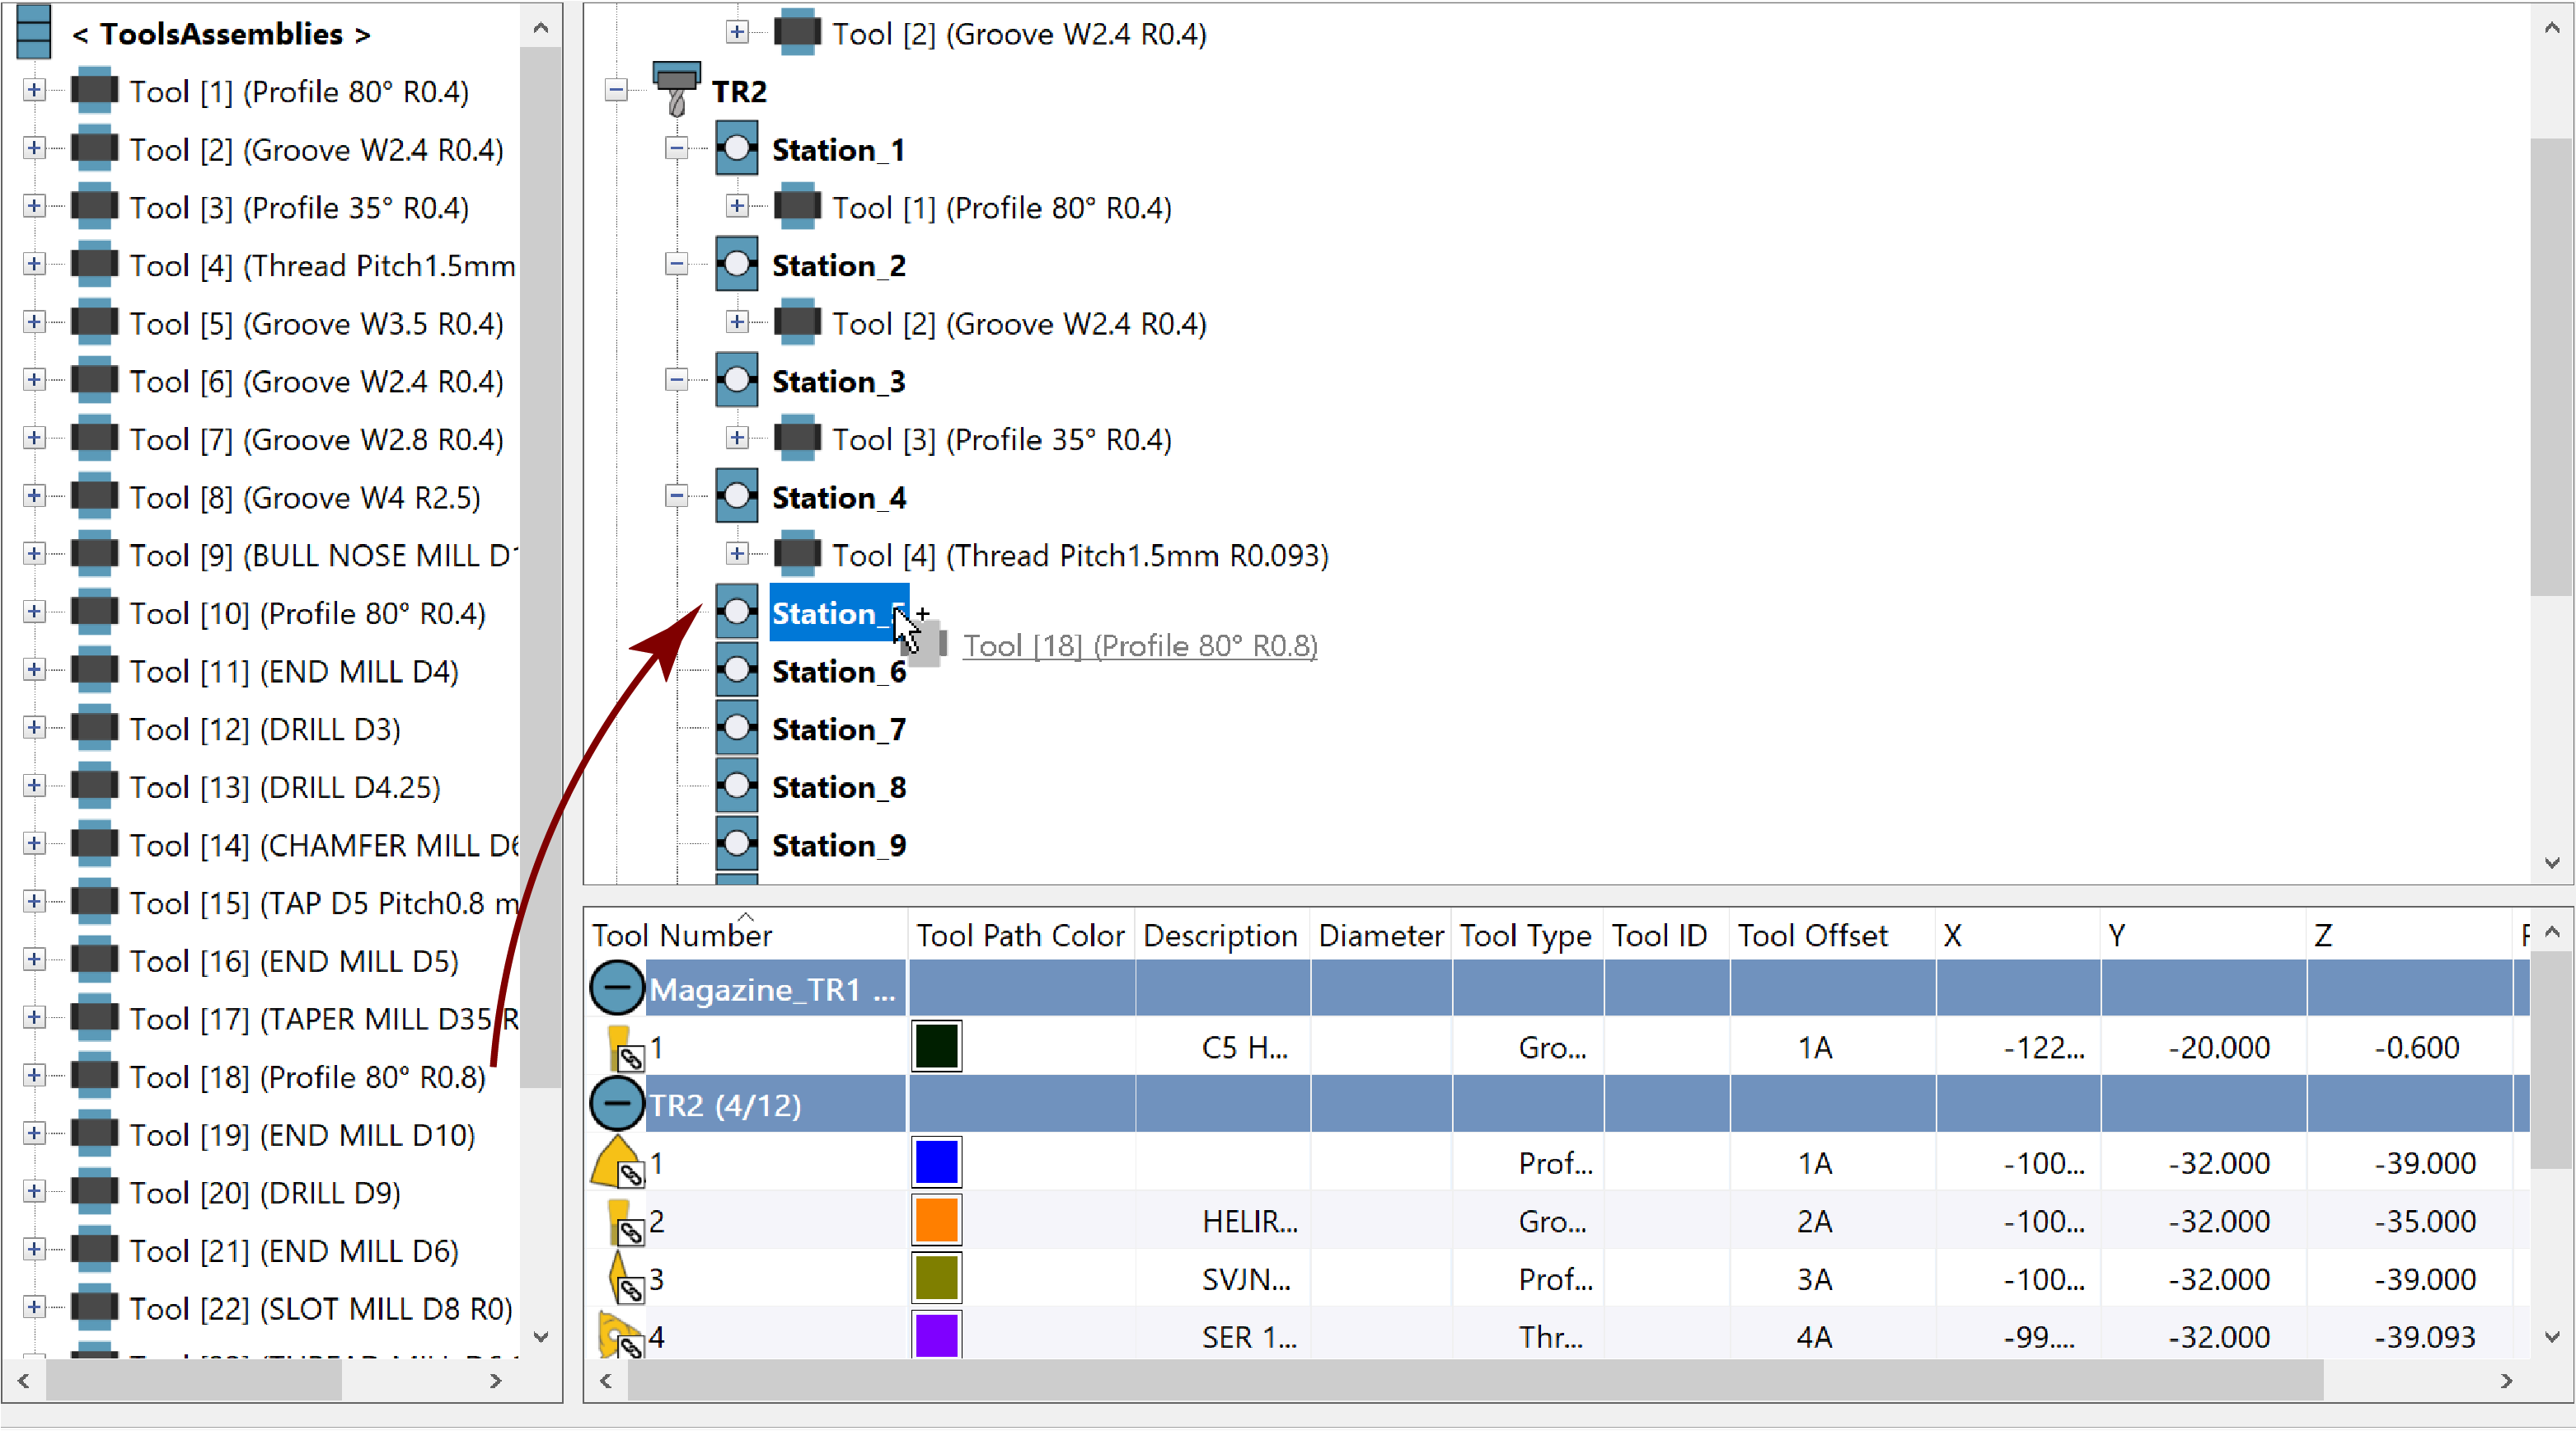
Advanced View provides additional functionality, enabling you to view/edit your Tool Items and their mounting positions in the Machine environment. The hierarchal tree structure reflects that which is defined in the *.vmid file of your CNC-Machine.
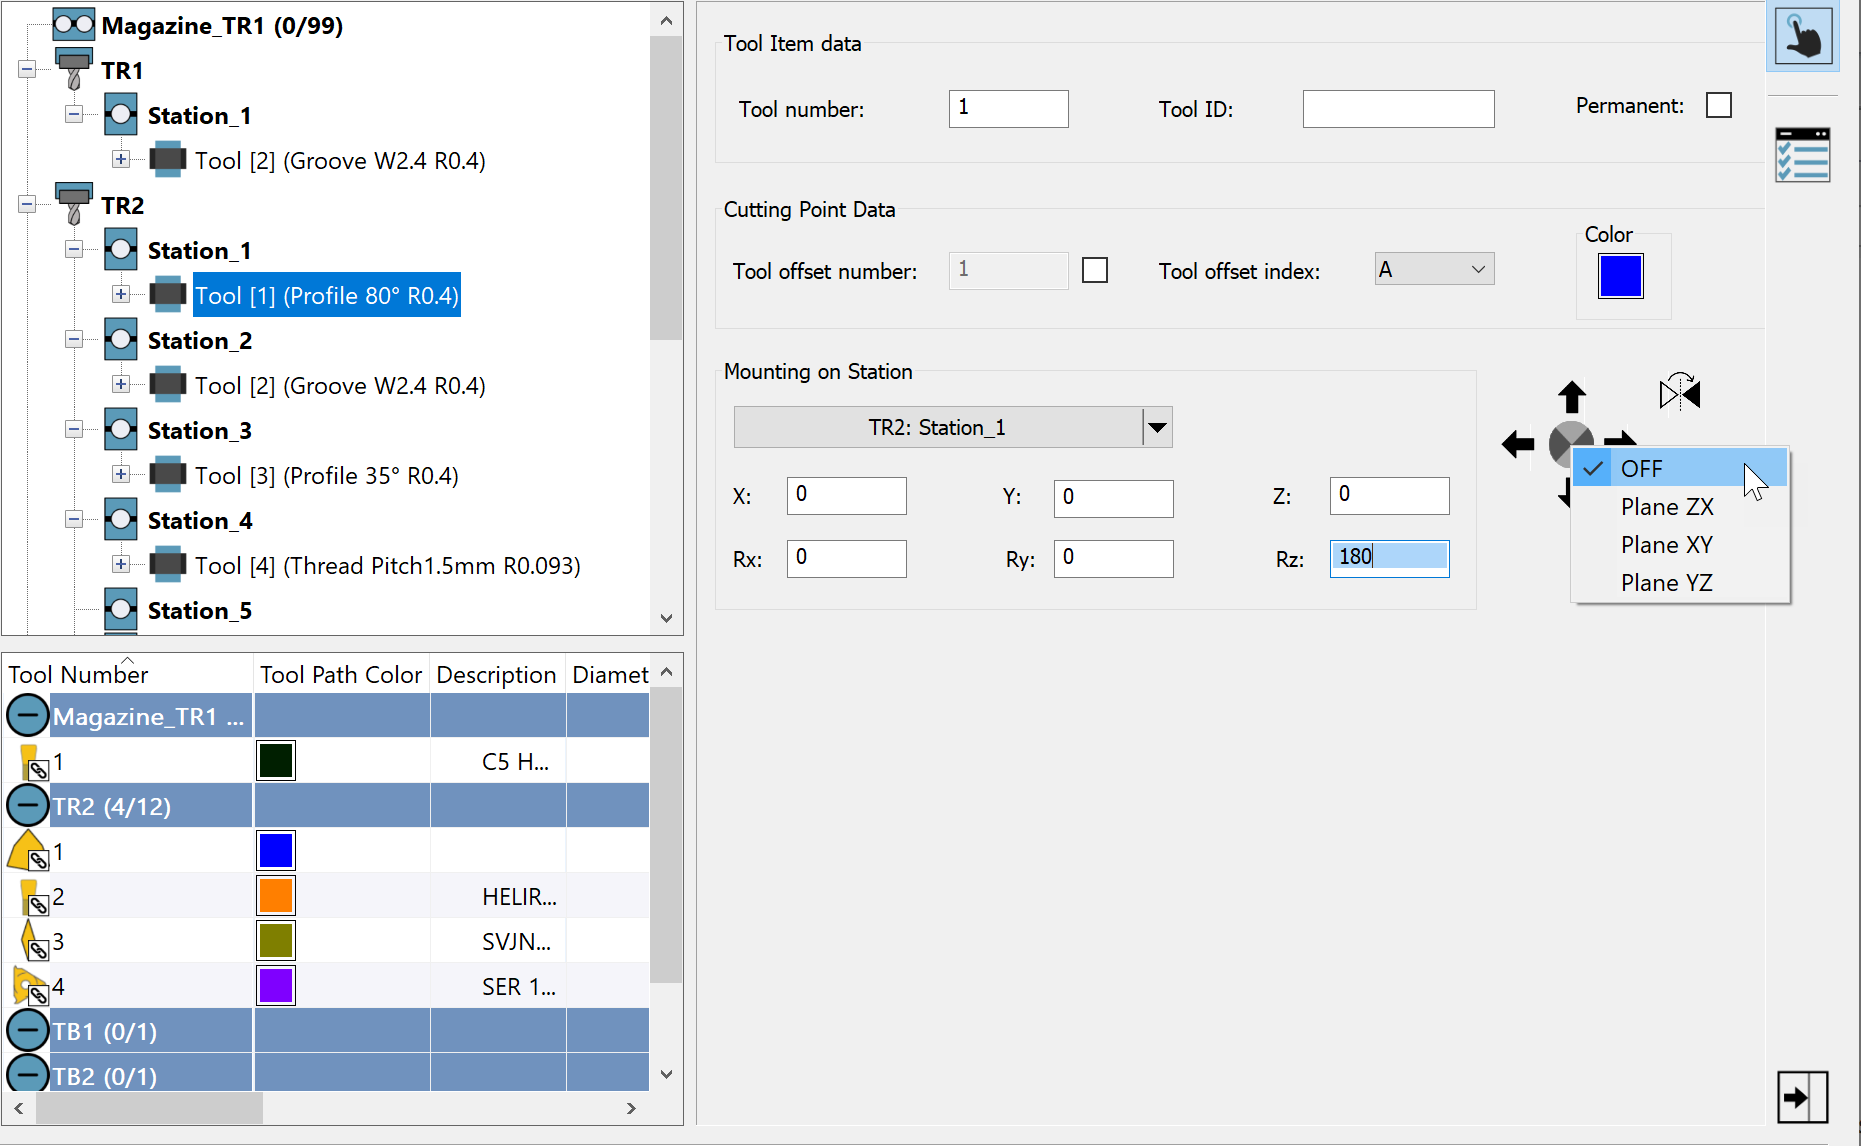
- After you have imported your Tool Items, define/modify their mounting positions on the CNC-Machine using the Mounting on Station options in Quick Access Data.
Mounting on station
In Quick Access Data, Mounting on Station drop-down list enables you to quickly change the mounting position of Tool Items on the CNC-Machine.
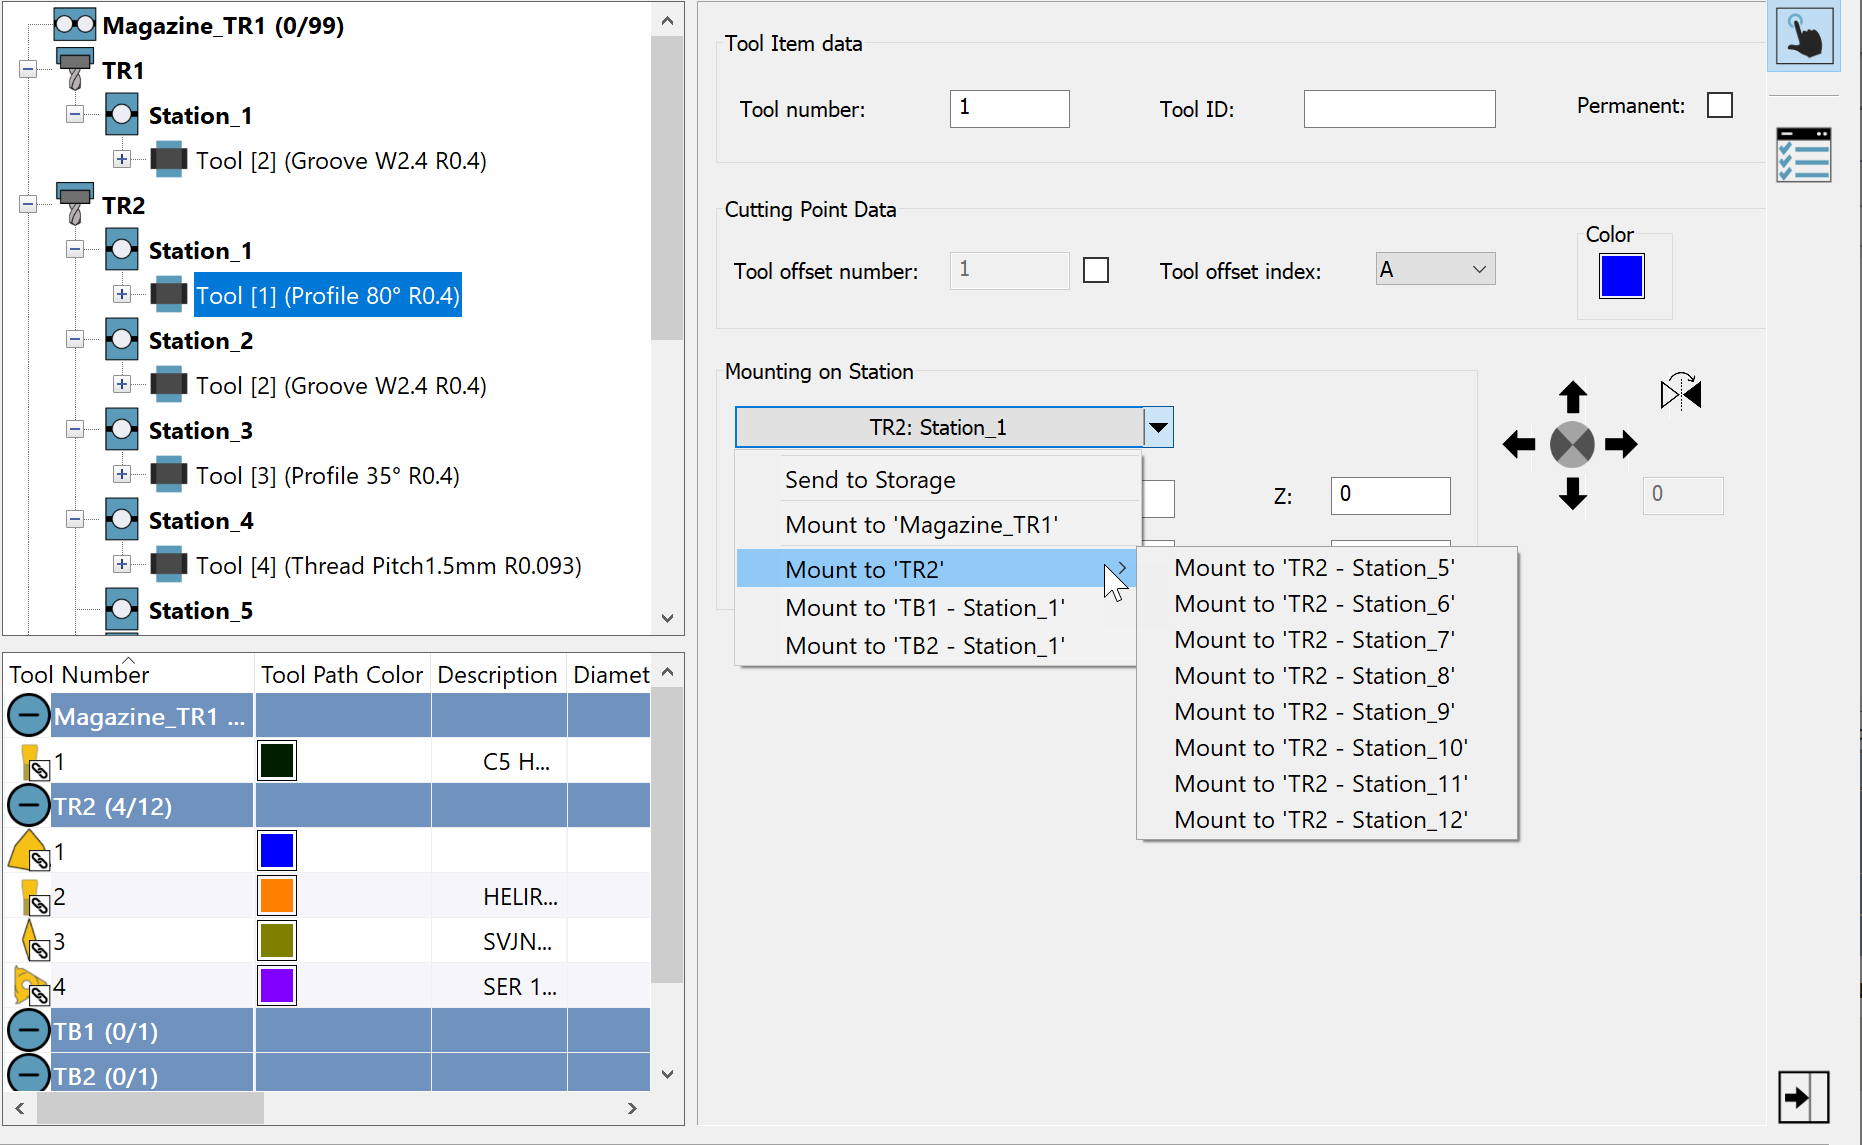
You can also modify, using linear/rotational or planar movements, the Tool Item position relative to the CoordSys position of the Station to which it is mounted.
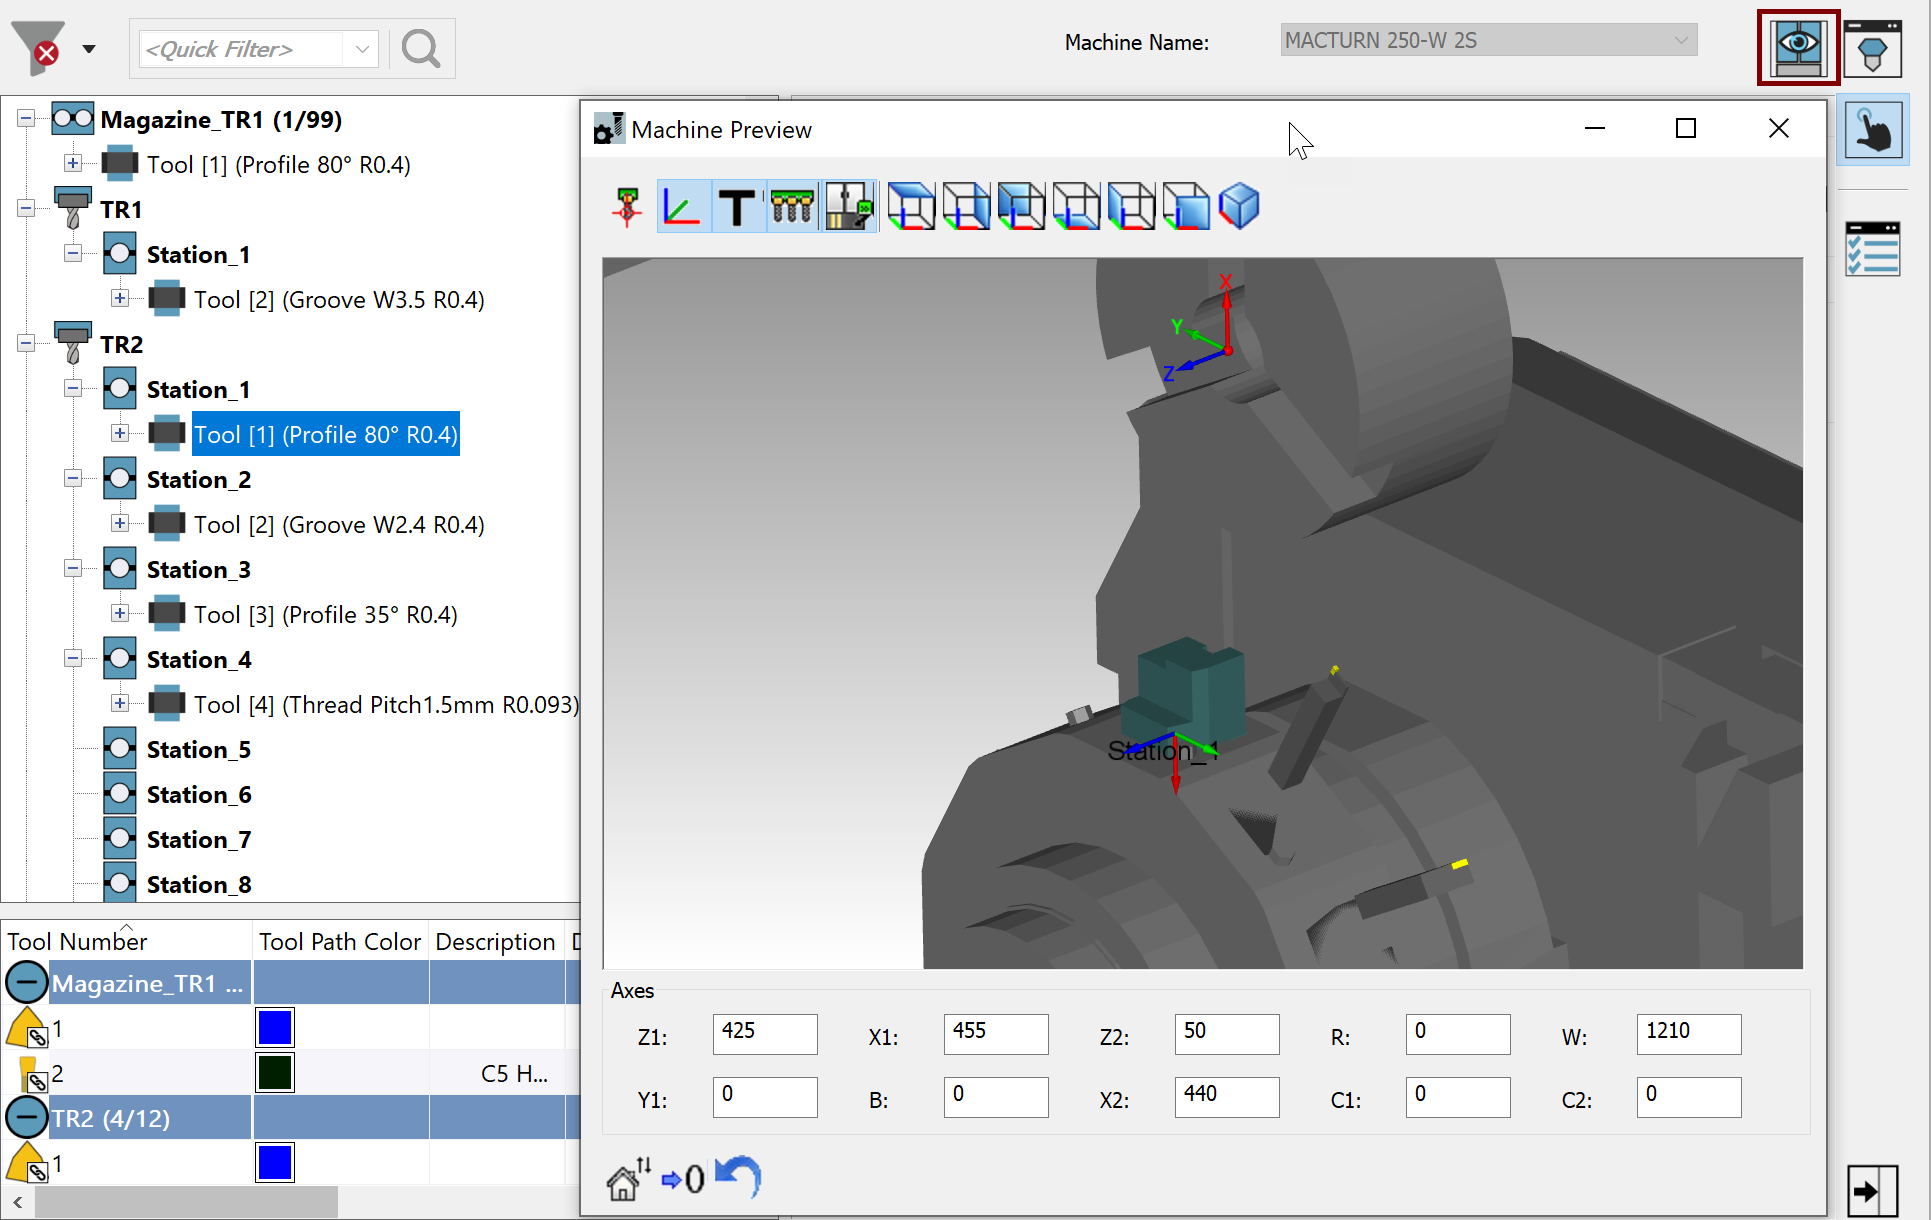
Such positions and movements can be visualized in the Machine Preview
window by clicking the ![]() at the upper right corner of
the TOOLKIT dialog box.
at the upper right corner of
the TOOLKIT dialog box.
- Once ready, save your Machine Tool Setup Library using the
Save
 / Save and Exit
  buttons at
the bottom right corner of the TOOLKIT dialog box OR using the Save/Save
As/Save and Exit
options in the ToolKit
main menu.
buttons at
the bottom right corner of the TOOLKIT dialog box OR using the Save/Save
As/Save and Exit
options in the ToolKit
main menu.
Related Topics