Tool Assemblies Library (*.tls)
The second level of tool management offered by SolidCAM ToolKit is the Tool Assemblies Library, which enables you to manage simple and complex tool assemblies. Each tool assembly is referred to as a Tool Item and comprises a combination of tool components such as the cutter and the tool holding system such as Adaptor and Holder. The defined Tool Items represent those existing in Tool Storage and prepared for use on any given CNC-Machine.

For documentation purpose, the Tool Items in a new Tool Assemblies Library are defined by importing components from the previously created Tool Components Library.
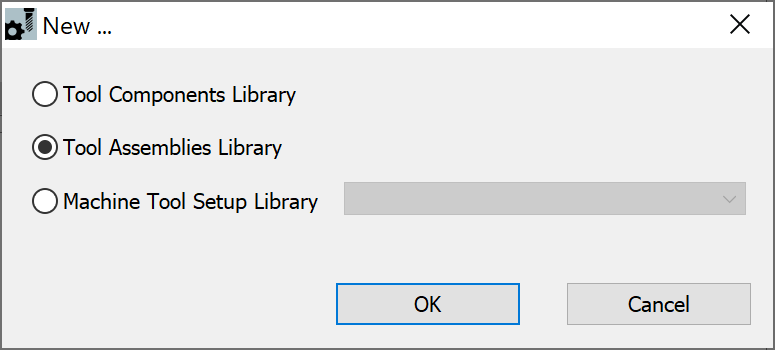
The steps to define a new Tool Assemblies Library are as follows:Defining New Tool Assemblies Library
- Start a new Tool Assemblies Library using ToolKit standalone or one of the various options within SOLIDWORKS/SolidCAM.
Displayed is the TOOLKIT dialog box at the Tool Assemblies Library level.

Importing Tool Components
On the Library Toolbar, click the Import from Tool Components Library option as shown.
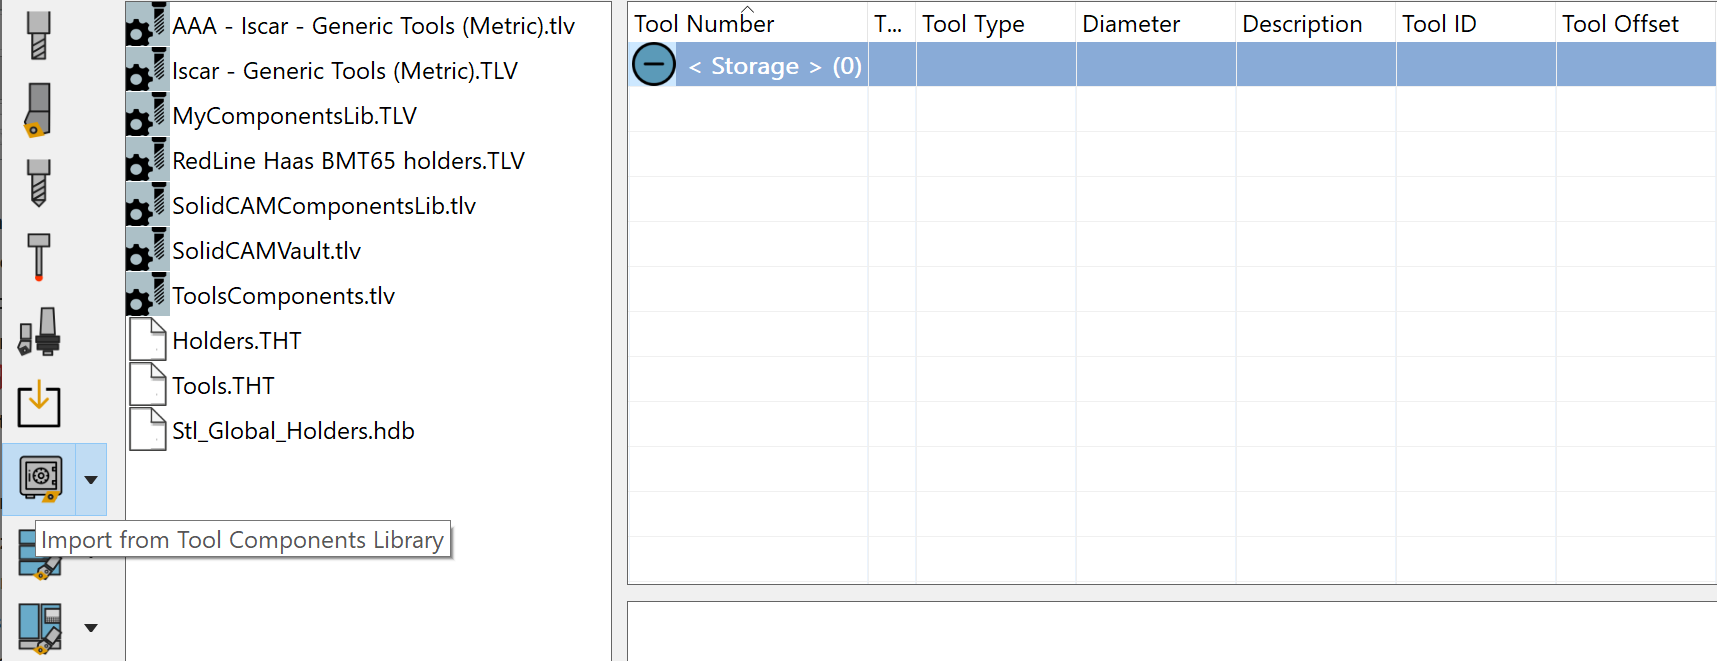
Displayed in the Selection Pane are the Tool Components Libraries (*.tlv files) existing in the Default folder directory defined in ToolKit Settings.
If you instead click the arrow icon ![]() , you can
use the Import dialog box to browse
to and open a Tool
Components Library that is saved in a different directory.
, you can
use the Import dialog box to browse
to and open a Tool
Components Library that is saved in a different directory.

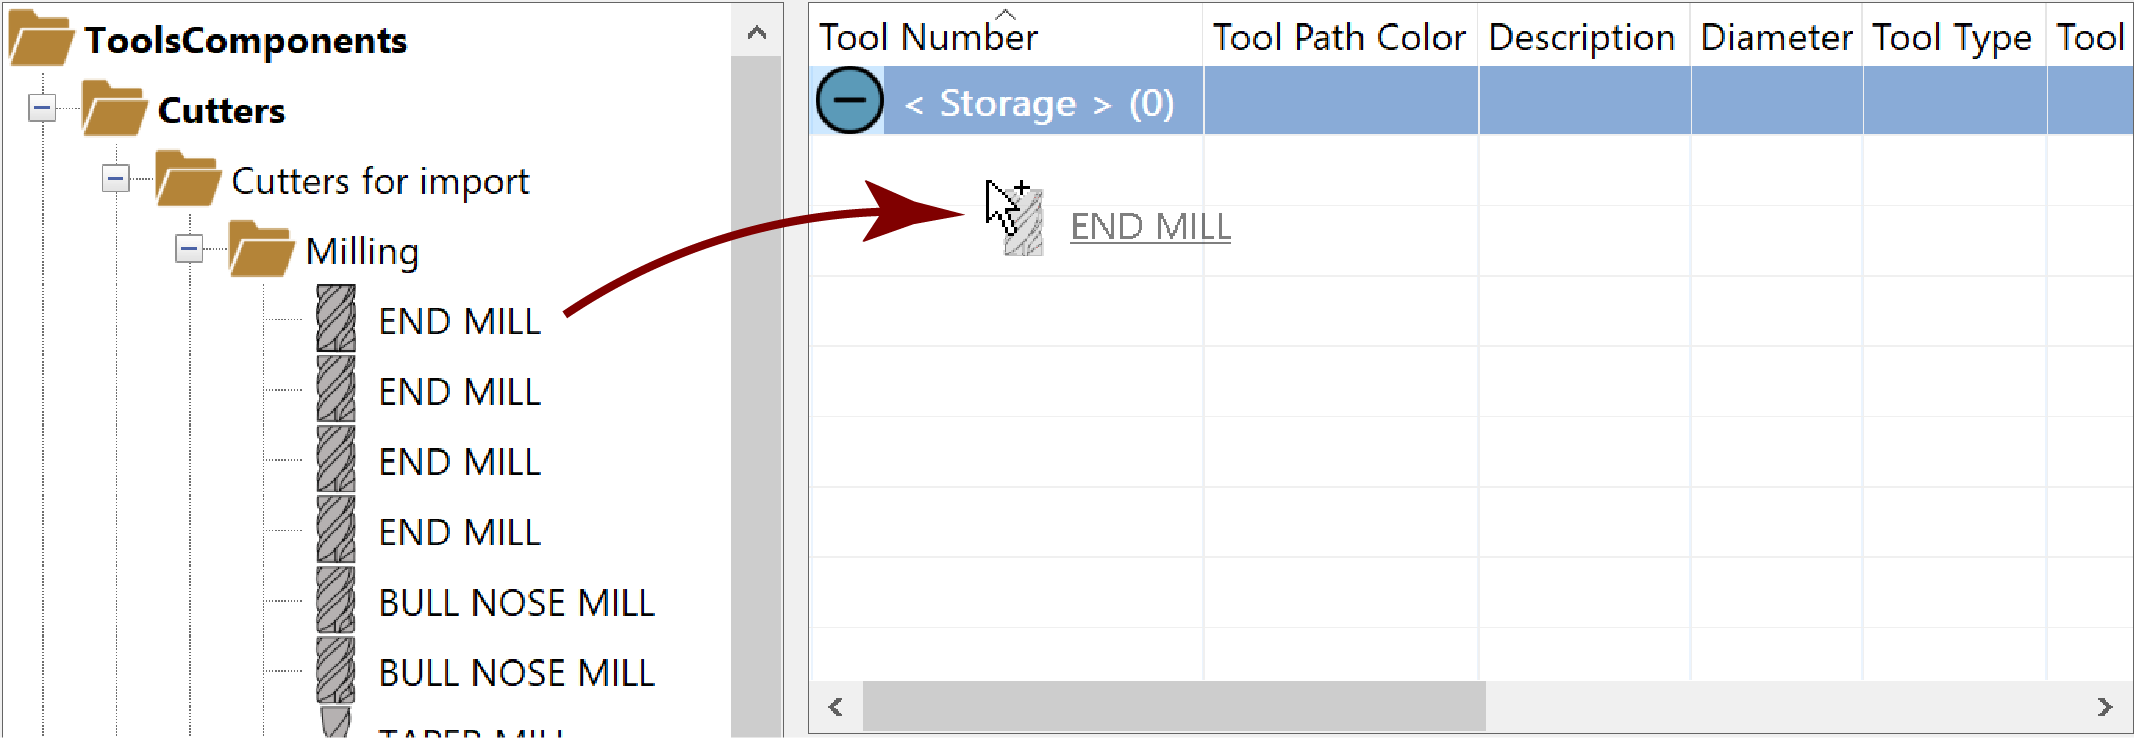
In the Selection Pane, double-click the Tool Components Library from which you want to import the components.

The Selection Pane displays the contents of the Tool Components Library. If necessary, the window can be expanded as shown for better viewing.
Creating Tool Assemblies
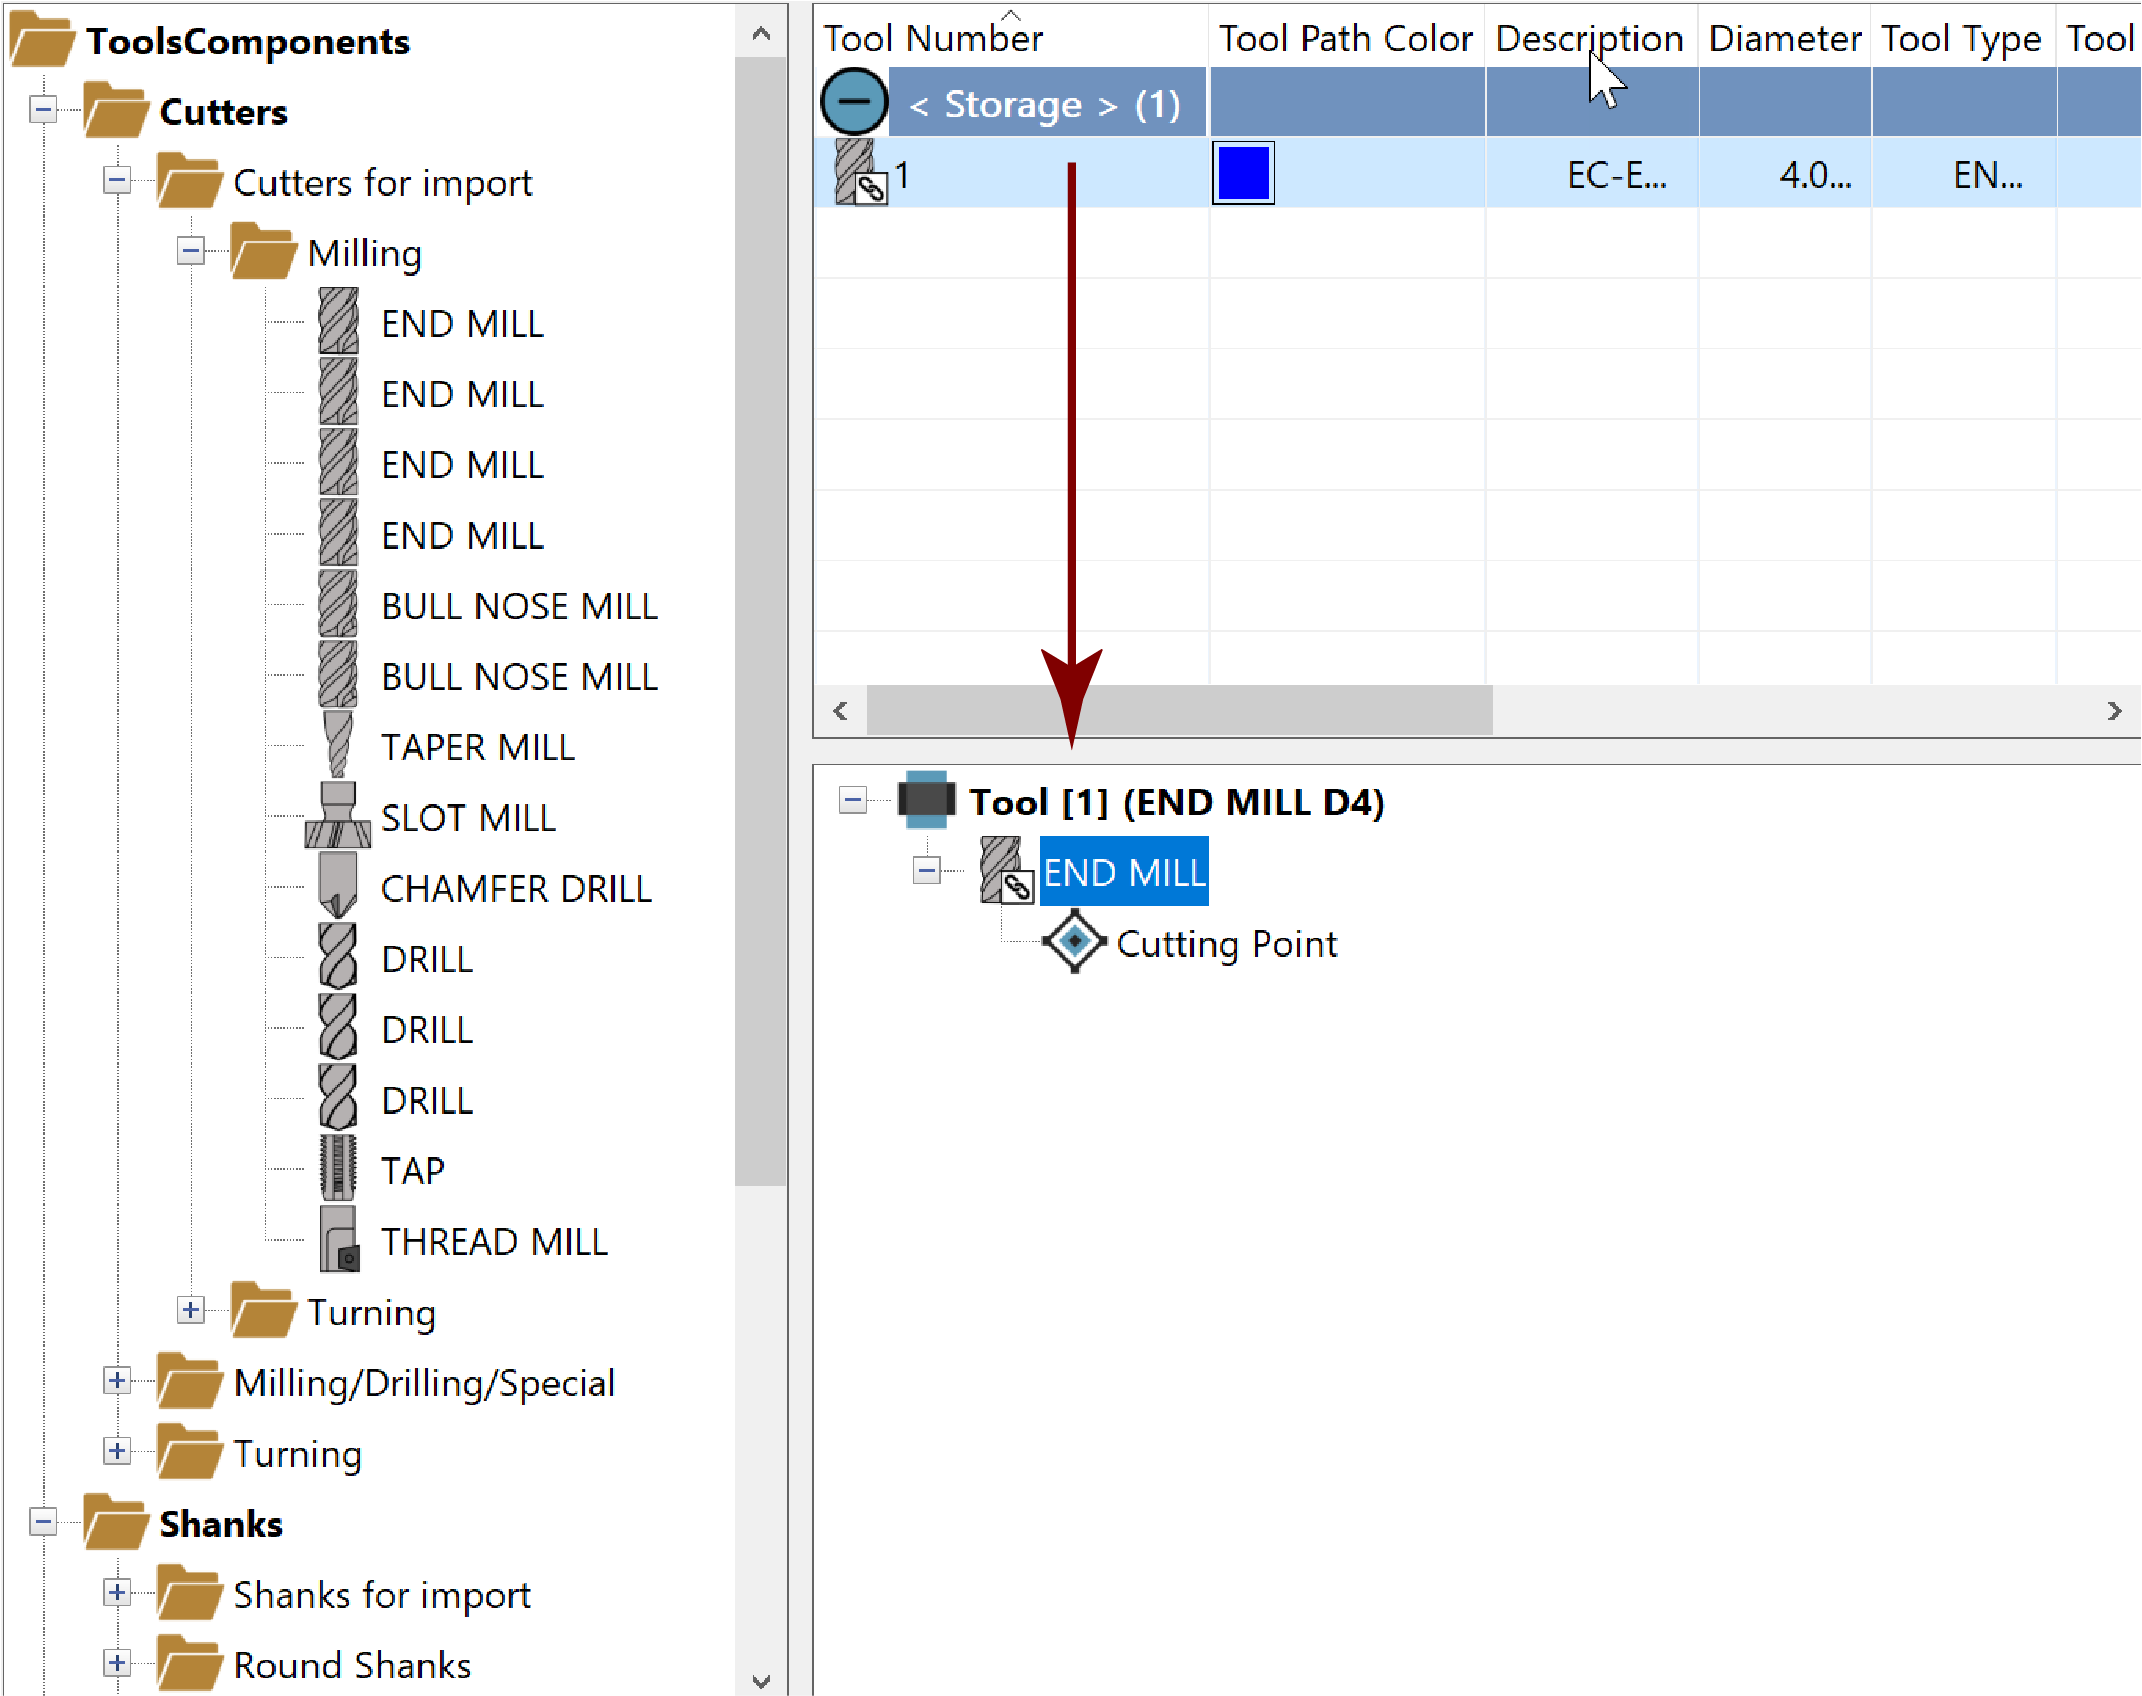
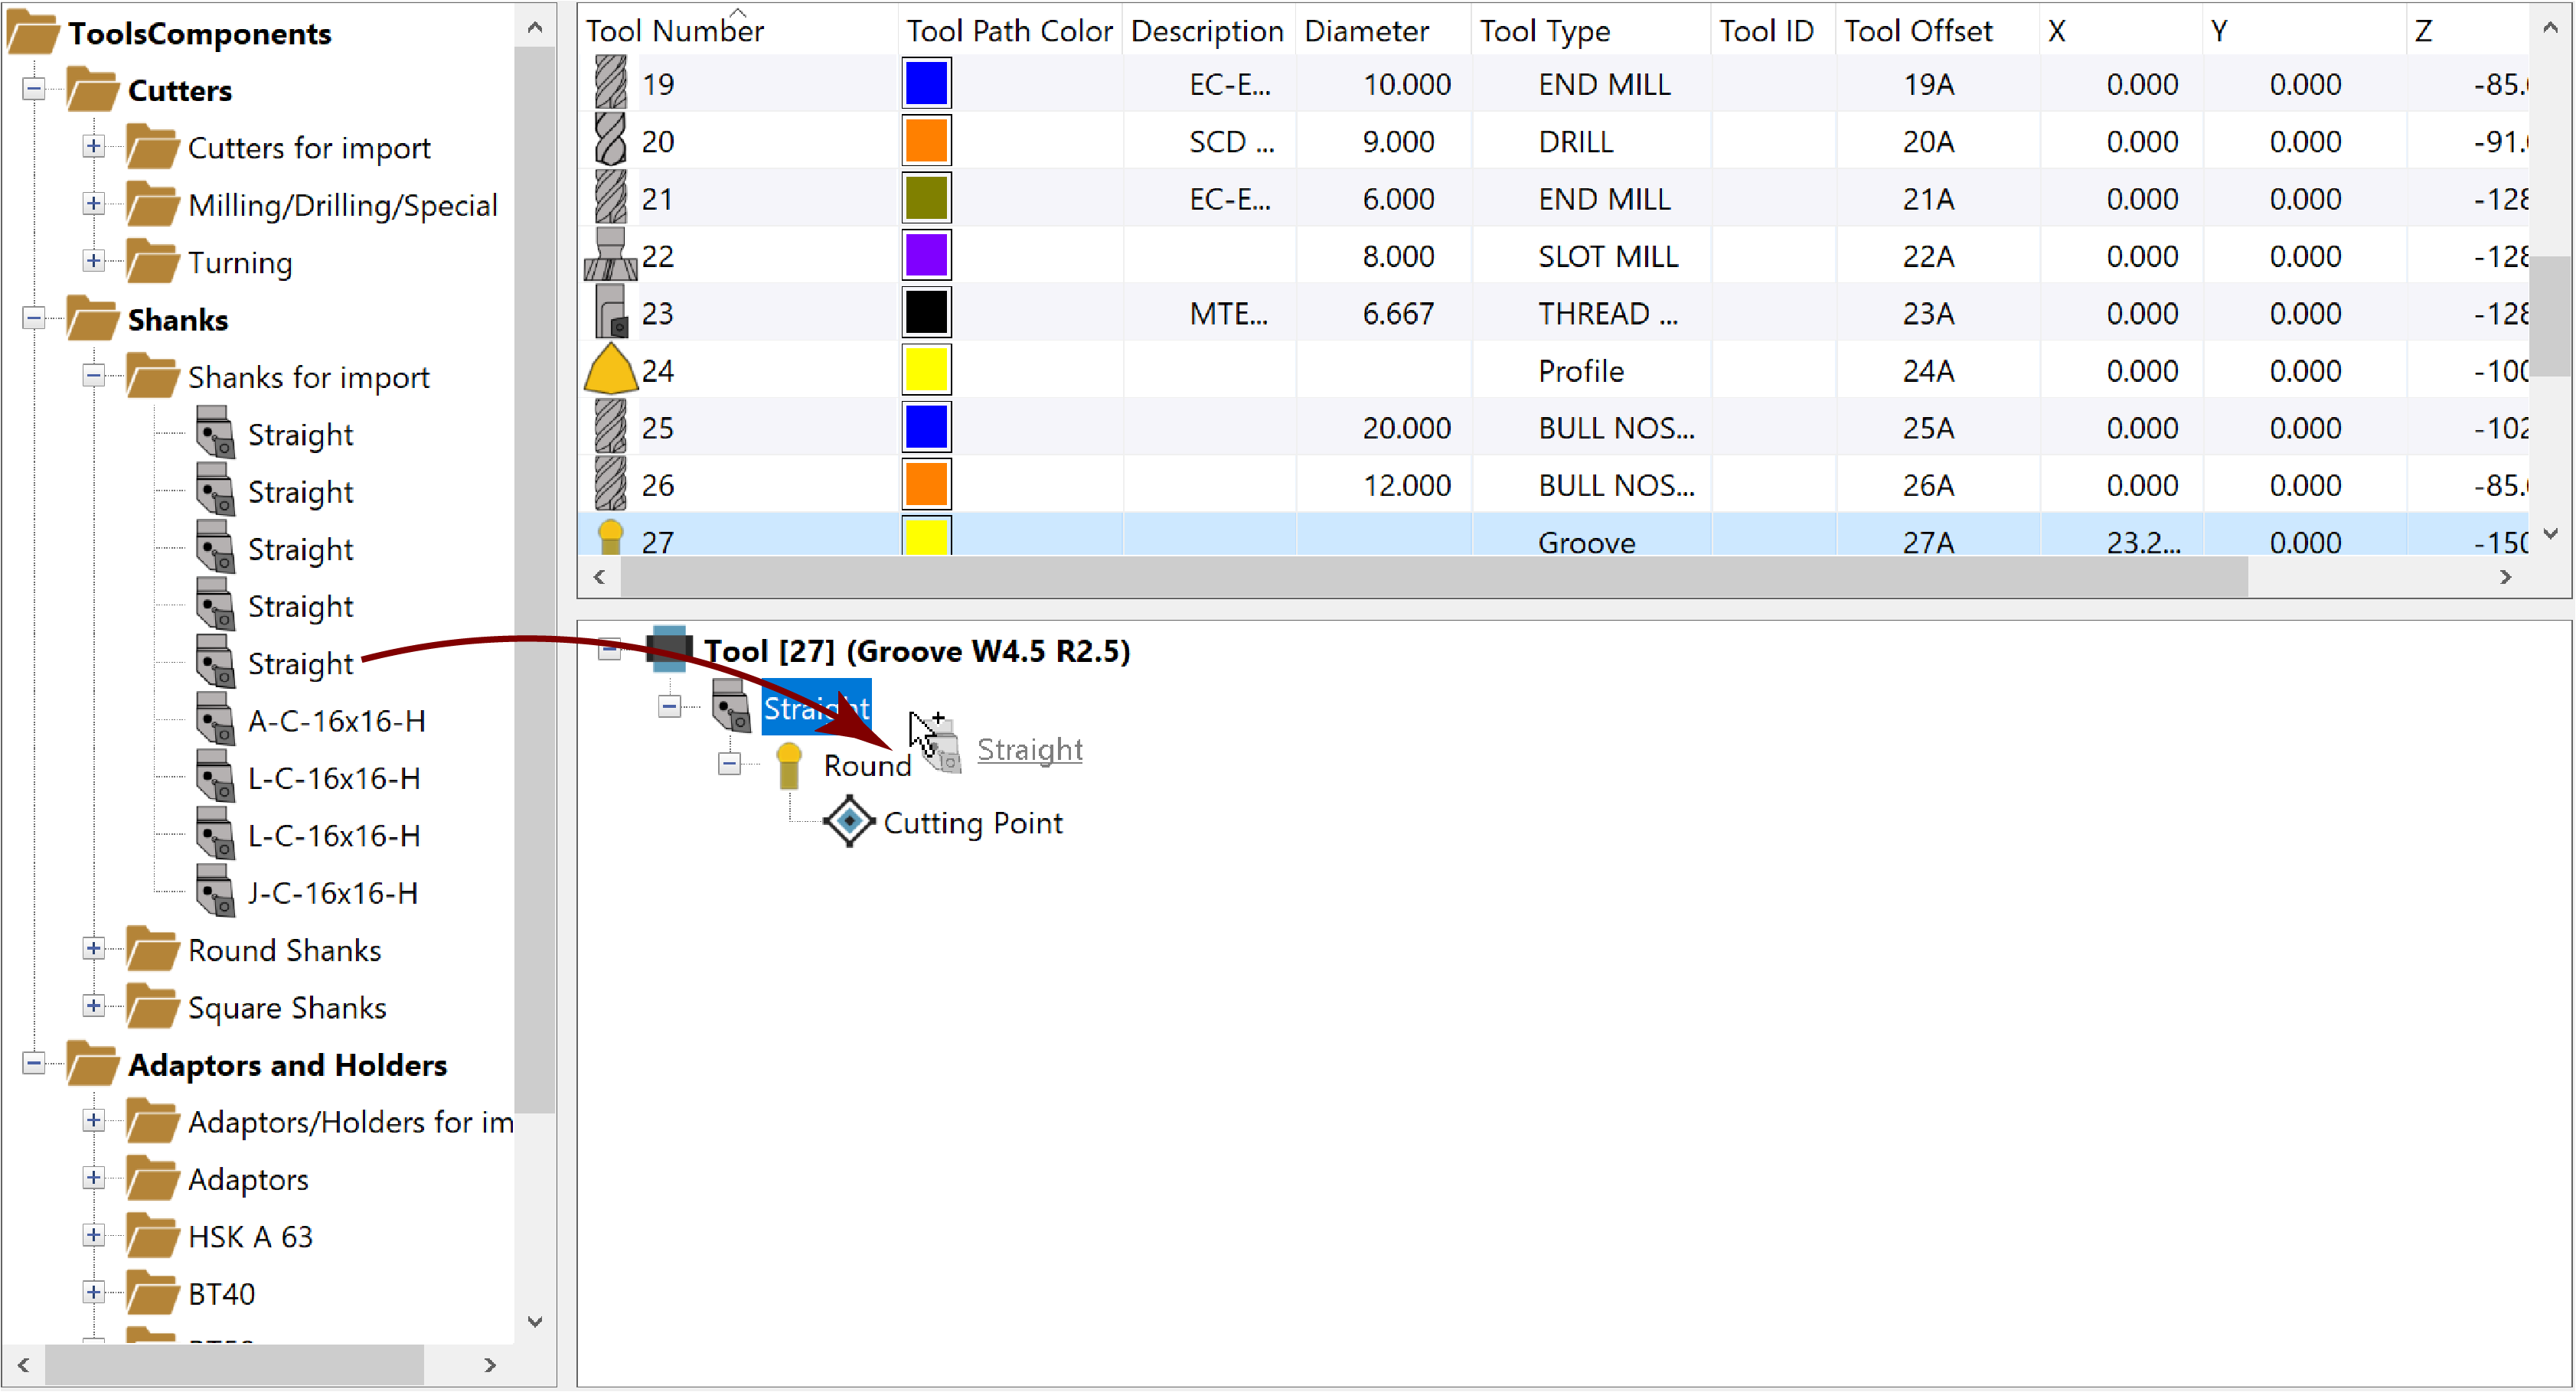
In the Selection Pane, expand the Cutters folders as needed and double-click the desired Cutter or simply drag & drop it into the Tool Table window.
Using the Tool Item Manager, you can create tool assemblies (Tool Items) and view/edit complete information about the Tool Item.
Upon adding your Cutter to the Storage Tool Table, the corresponding Tool Item is created and displayed in the Tool Item Manager.
Using the Tool Item Manager, you can create tool assemblies (Tool Items) and view/edit complete information about the Tool Item.
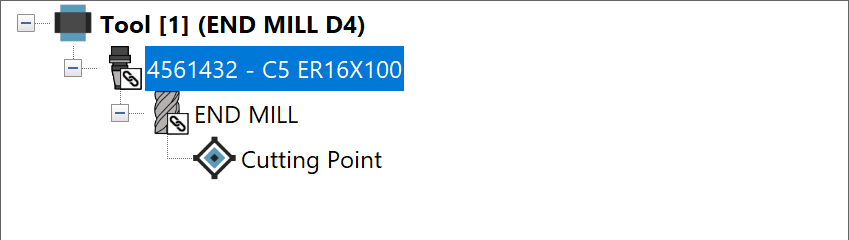
Once the Cutter component is added to the Tool Table, we can start assembling the Tool Item. Adaptor/Holder components can be added and defined in several ways, manually or automatically. Double-click in the Selection Pane or drag & drop the desired component(s) into the Tool Item window OR we can use the right-click commands in the Tool Table list or the Tool Item Manager to add the Adaptor and Holder, individually or together.
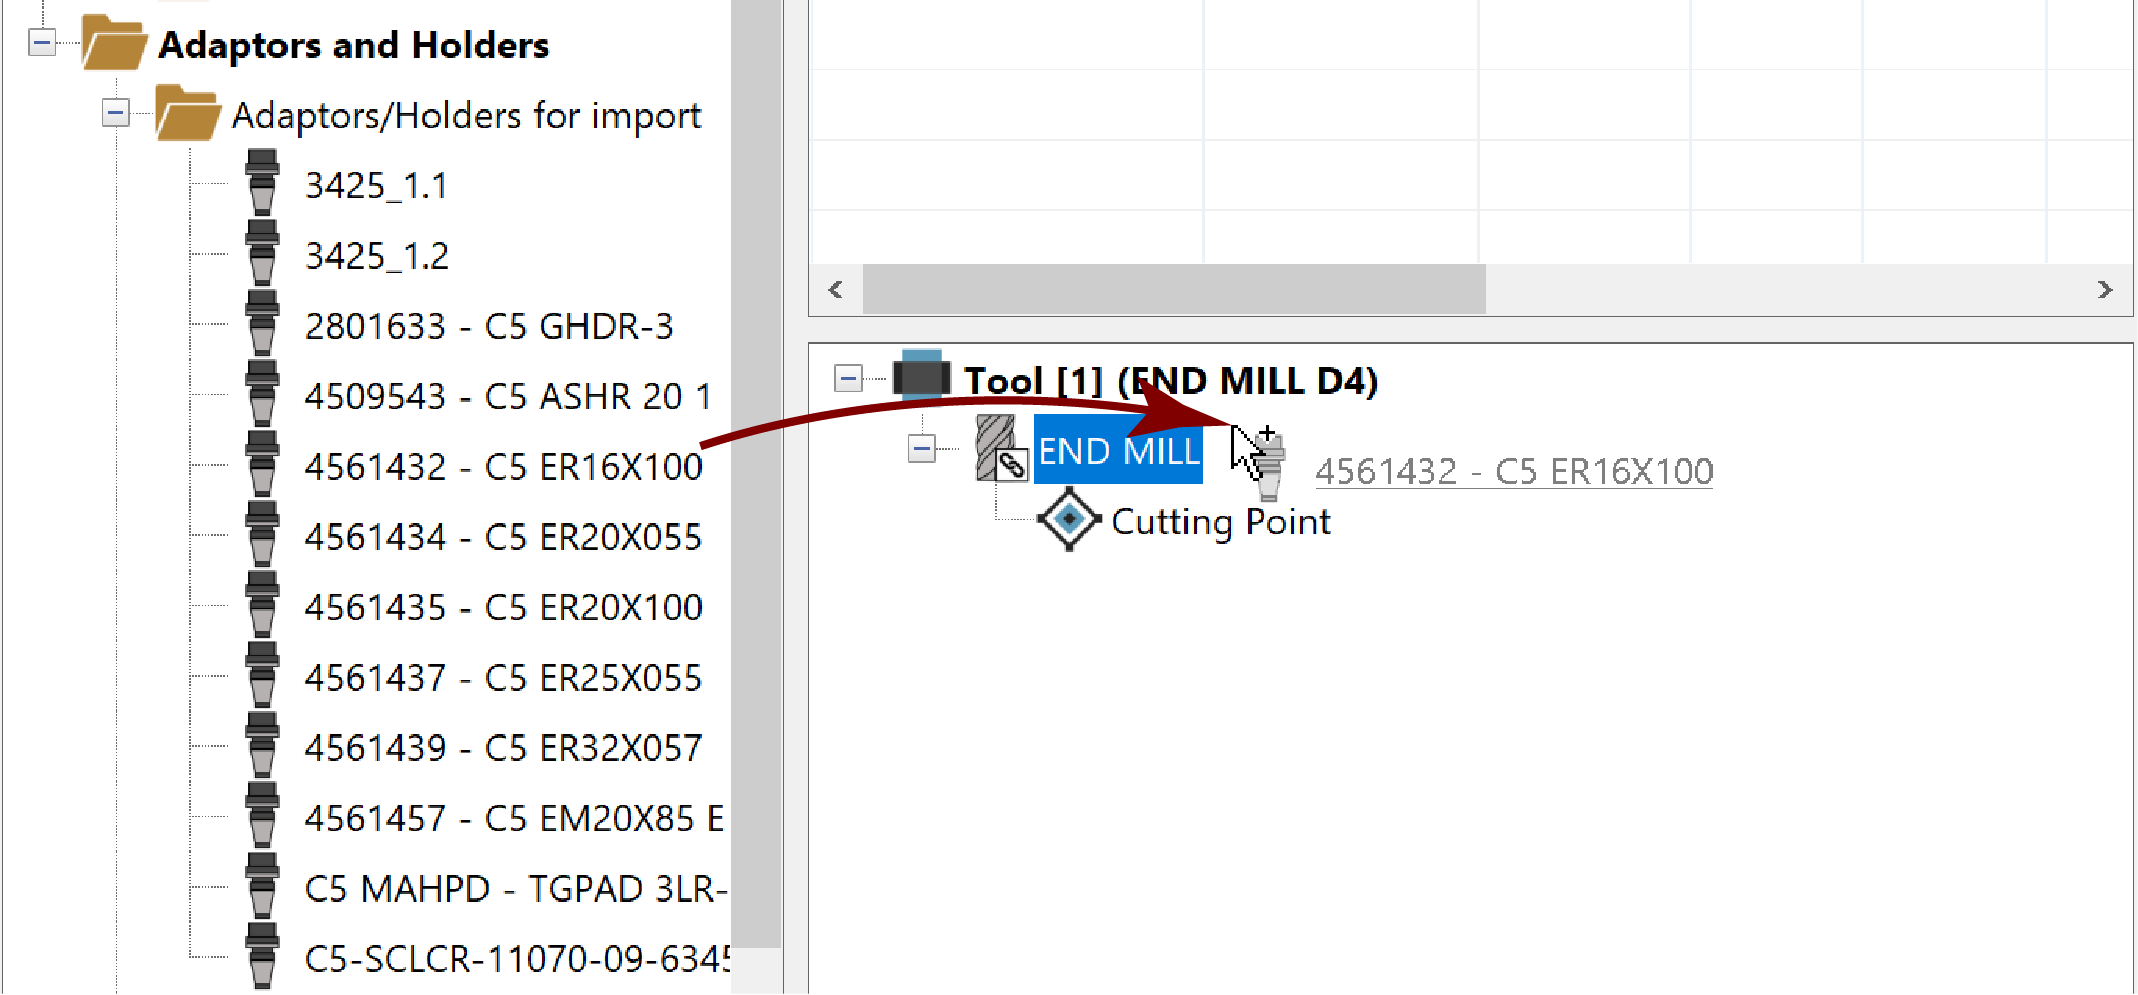
In the example shown below, the Holder component is added to the Tool Item tree.
Displayed on the right-hand side of the TOOLKIT dialog box is the Tool Item/Component Data. The Data Toolbar buttons and Data Page parameters and options will vary depending on your selection in the Tool Item tree.
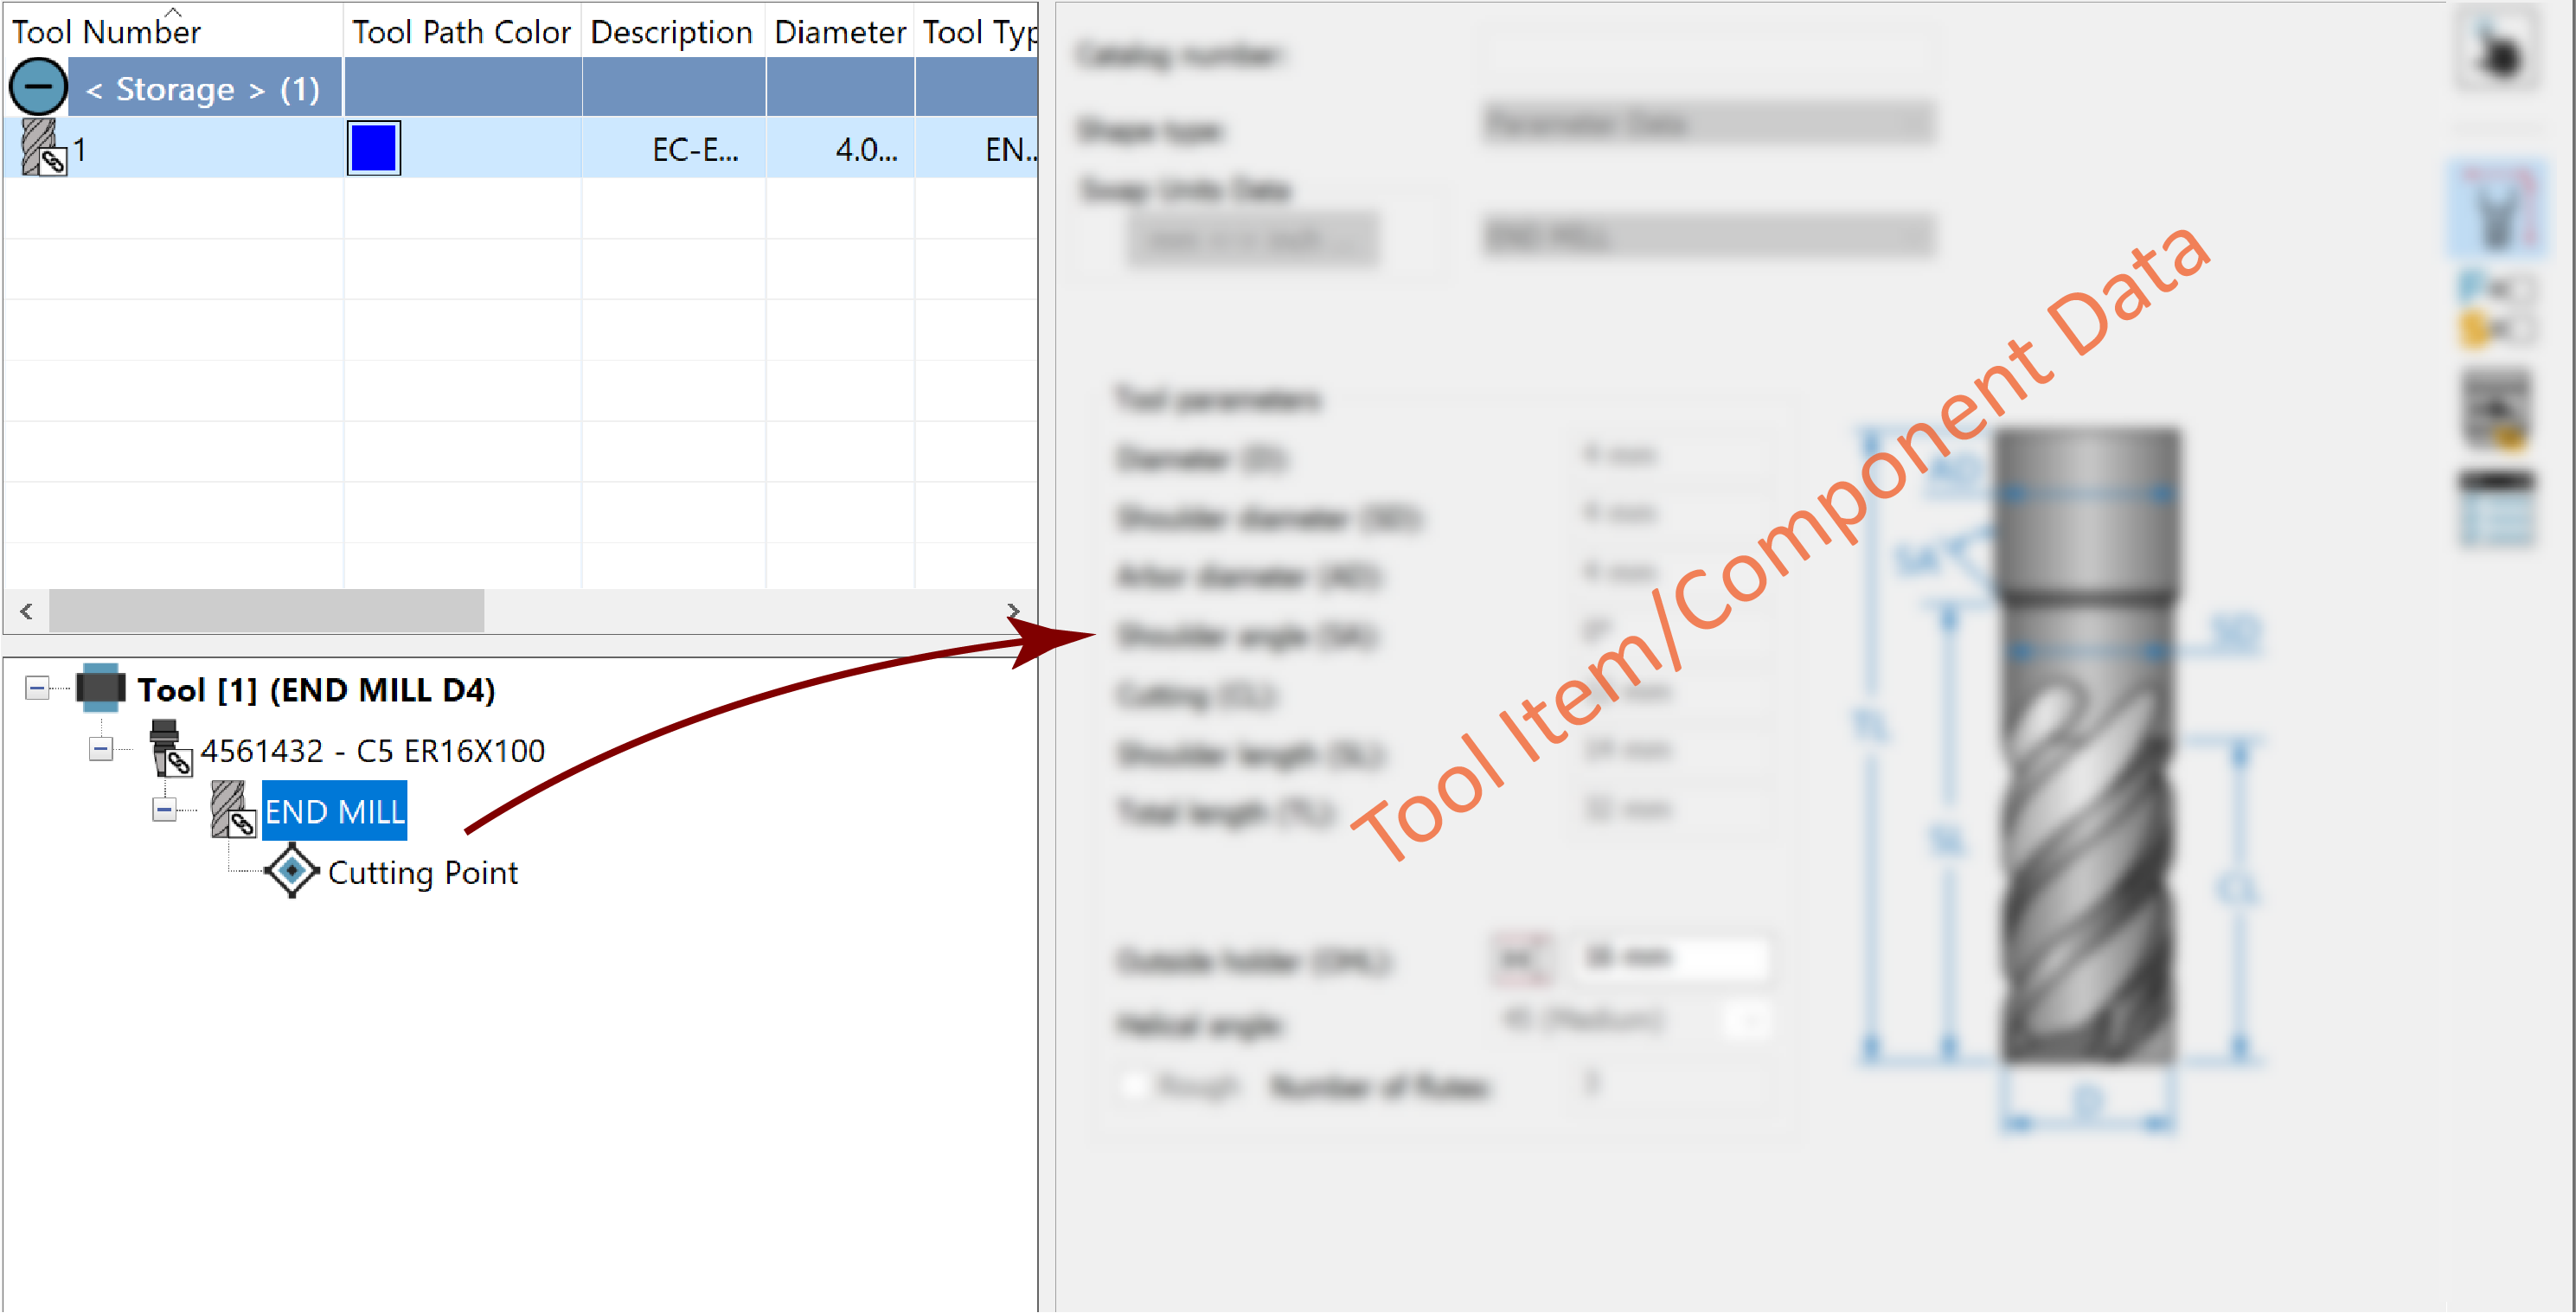
Using the Data Toolbar and Pane, view and edit as needed the Tool Item properties.
Imported components are linked to the ToolKit Tool Library chosen for import (Tools Components.tlv in this case) and have editing restrictions. Only the properties relevant to the Tool Item assembly can be edited.
Tool Assemblies Data
The properties relevant to the Tool Item assembly include those in Quick Access Data, Connection Data, Offset Data and Properties Data.
Continue importing components and assembling your Tool Items as necessary.
If you are importing from a Tool Components Library that has numerous components, the available ToolKit filter options can help save time when searching for components of specific criteria.
- Once your Tool Assemblies Library is ready, save it using the available
using the Save
 / Save and Exit
  buttons at the bottom right corner of the TOOLKIT
dialog box OR using the Save/Save As/Save
and Exit options in the ToolKit
main menu.
buttons at the bottom right corner of the TOOLKIT
dialog box OR using the Save/Save As/Save
and Exit options in the ToolKit
main menu.
Related Topics